Upgrading Wizdom on SharePoint Online
Every month, a new version of Wizdom is released. To keep your intranet fresh and shining, being on top of these releases is a good idea. Luckily, it’s very simple to upgrade your intranet to the newest Wizdom version. In this guide, we describe the steps to upgrade a Wizdom solution on SharePoint Online.
Last edited January 7 2018
See what your current version of Wizdom is
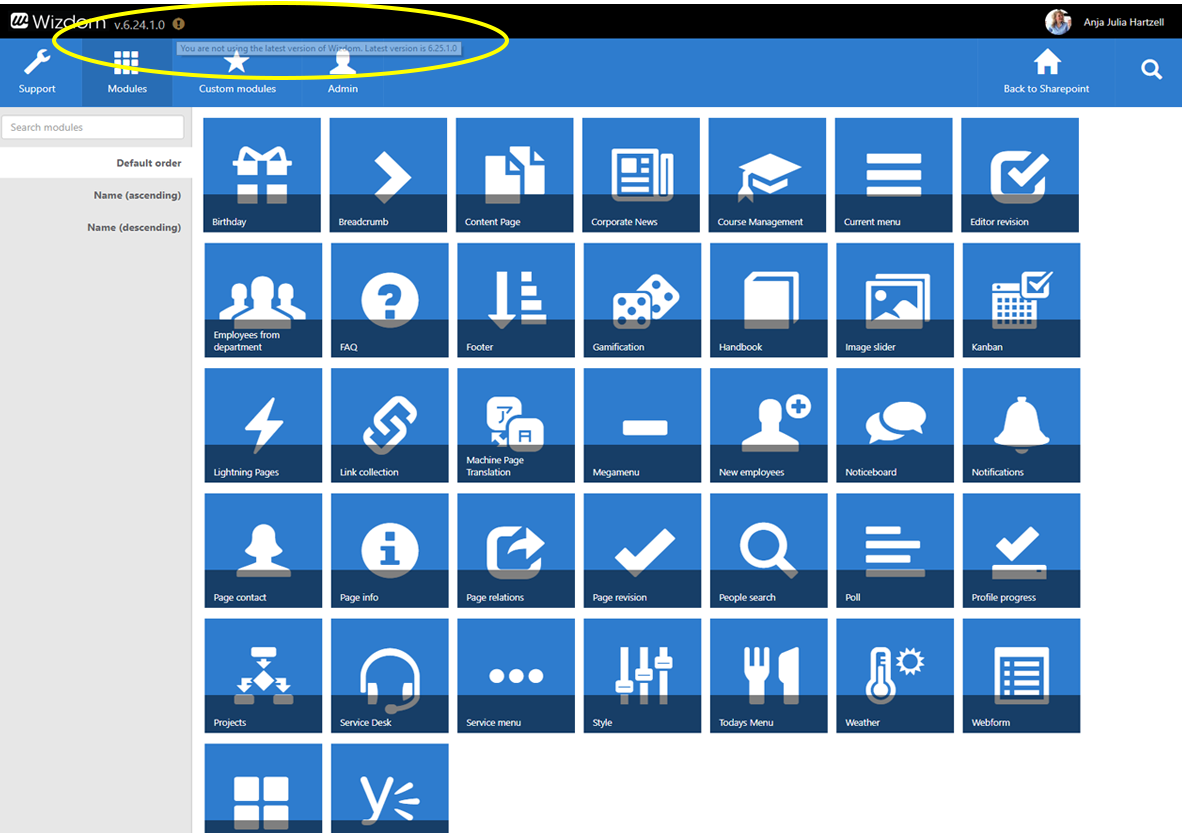
Visiting Wizdom Configuration Center, you can always see what version of Wizdom your solution is currently running on.
In the left corner, just next to the Wizdom logo, you’ll see the number of the version you’ve employed. A red exclamation mark tells that you aren’t running on the lates release, while a green check mark will let you know that you’ve already upgrated to the latest Wizdom version.
In this example, a red exclamation mark next to the Wizdom version informs that the Wizdom version used is not the latest. Hovering over the version number you’ll see the number of the newest Wizdom version.
Upgrading Wizdom
First, find an appropriate hour to start the upgrade process. During the approximately 20 minutes it takes for the upgrade to process, Wizdom will be unresponsive, and no user will be able to access your intranet.
NOTE: The upgrade will affect the whole Wizdom installation. This means that all site collections, with the Wizdom installation installed, will be affected.
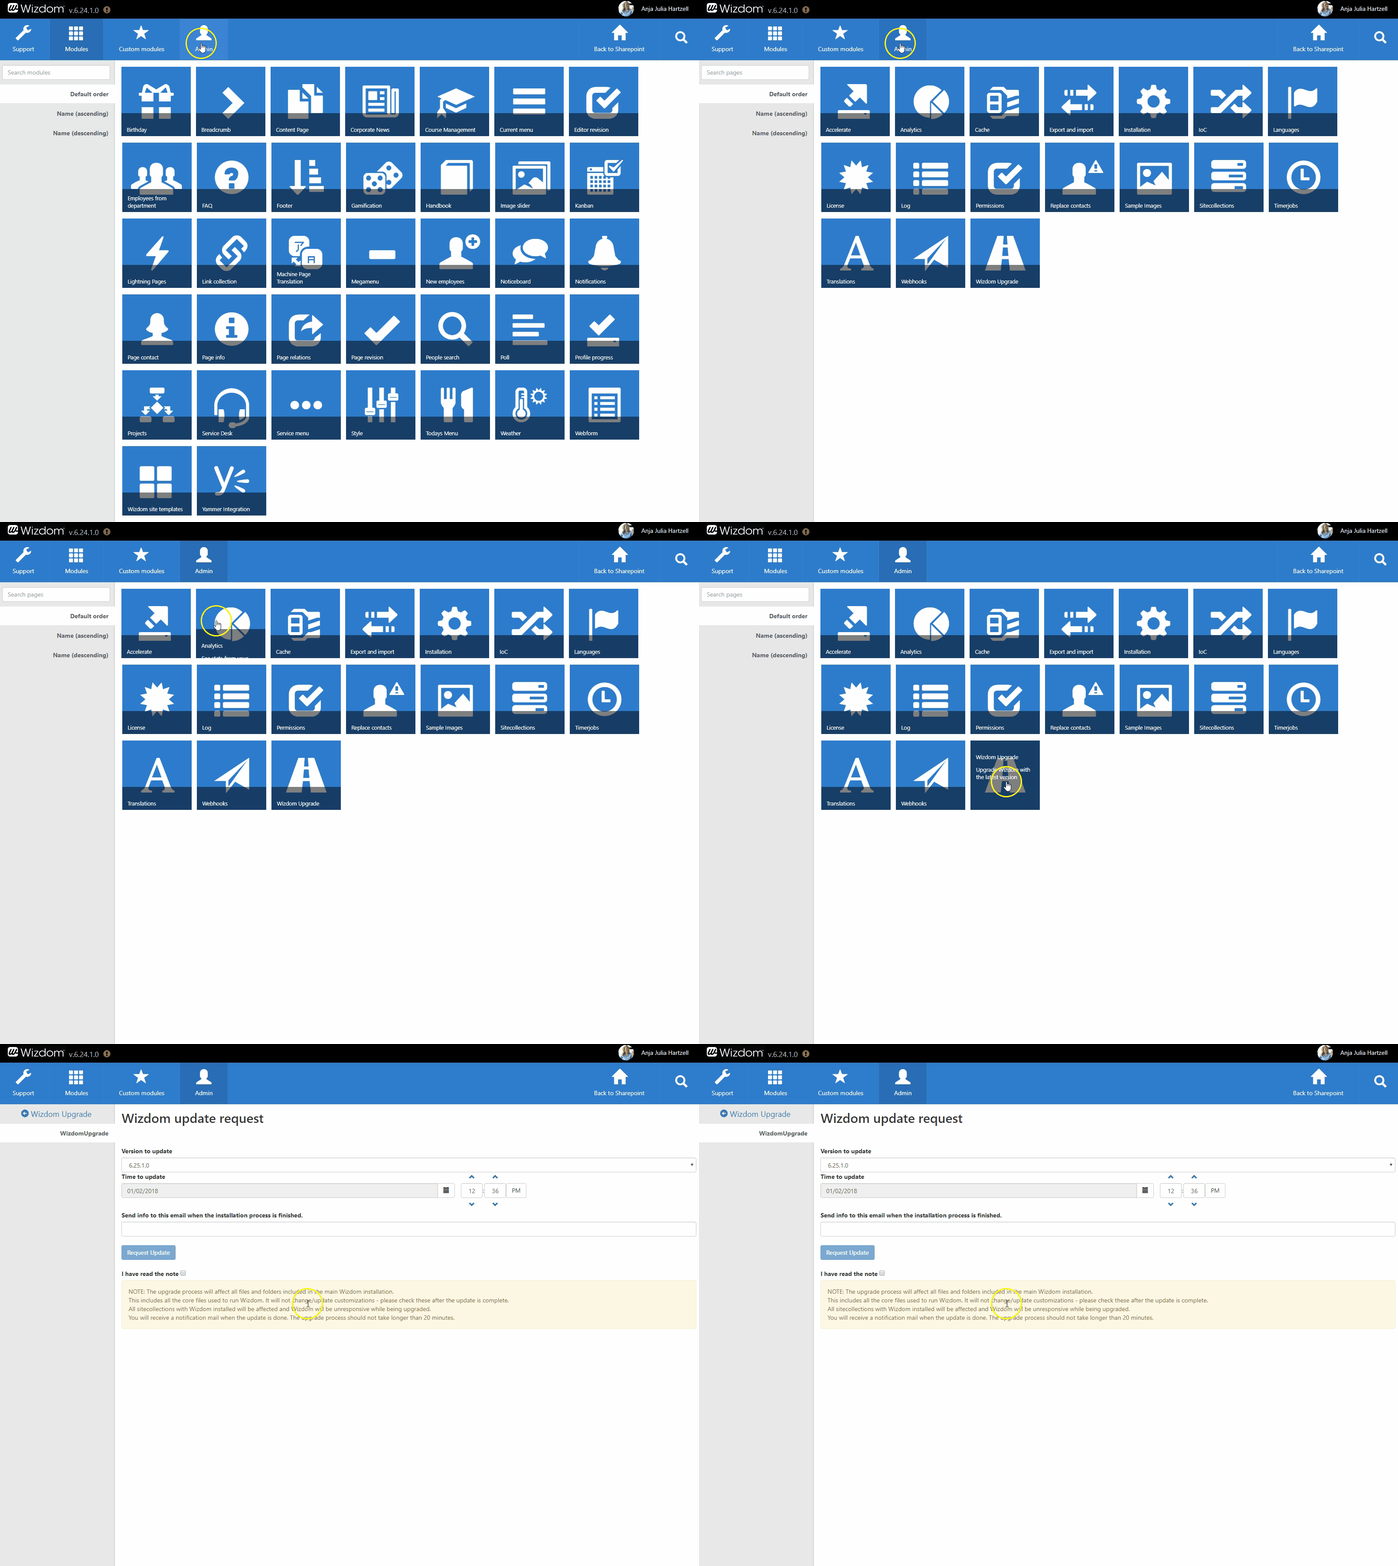
To start or schedule the upgrate process of your solution, go to the ‘Admin’ area in Wizdom Configuration Center and select the ‘Wizdom Upgrade’ tile.
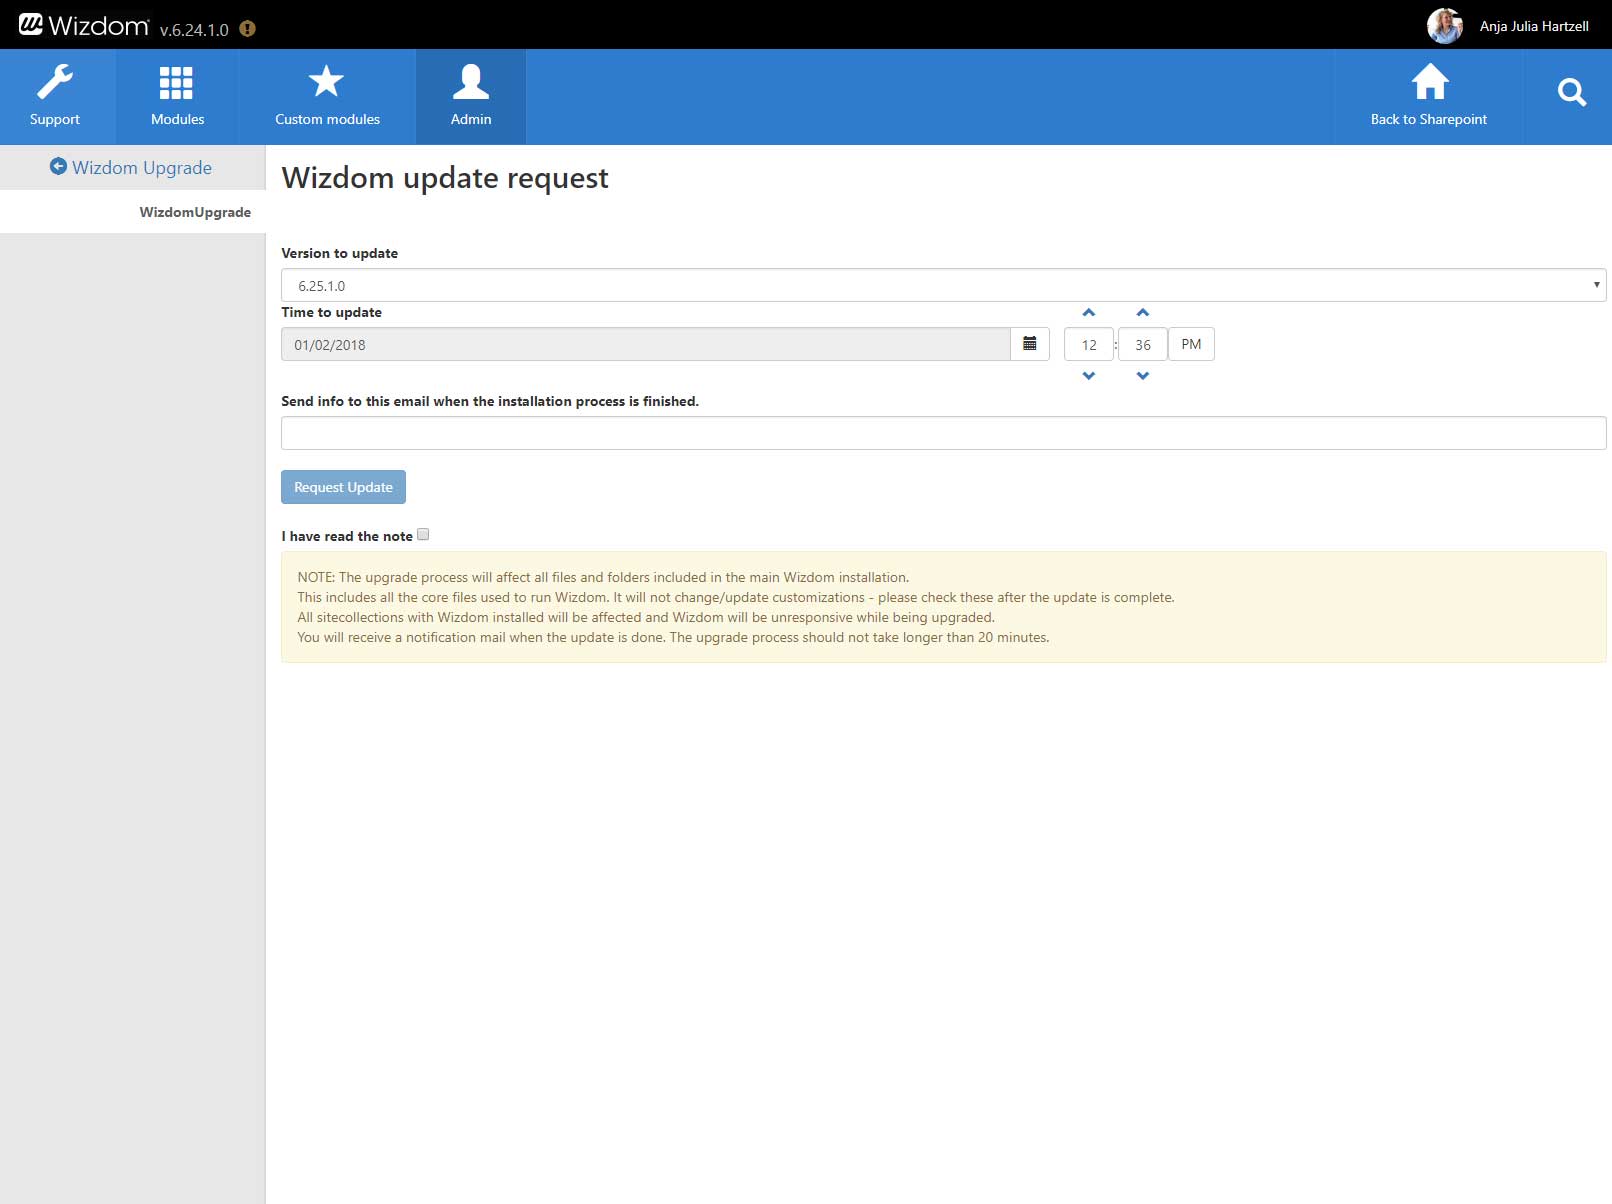
This will lead you to the Wizdom upgrade page.
In ‘Version to update‘, you select the version of Wizdom you want to upgrade to. You’re given the option of upgrading to all versions released after the solution you’re currently running on.
‘Time to update‘ allows you to schedule the upgrade. E.g. to ensure the upgrade will disturb production the least, you can schedule it to take place at a time that is out of production hours.
After the installation process is finished, you will receive an email notification. Write the email address, you wish to recieve the notification on, in the field ‘Send info to this email when the installation process is finishes‘.
NOTE: You can’t start the upgrade process unless all fields in the upgrade page is filled in.
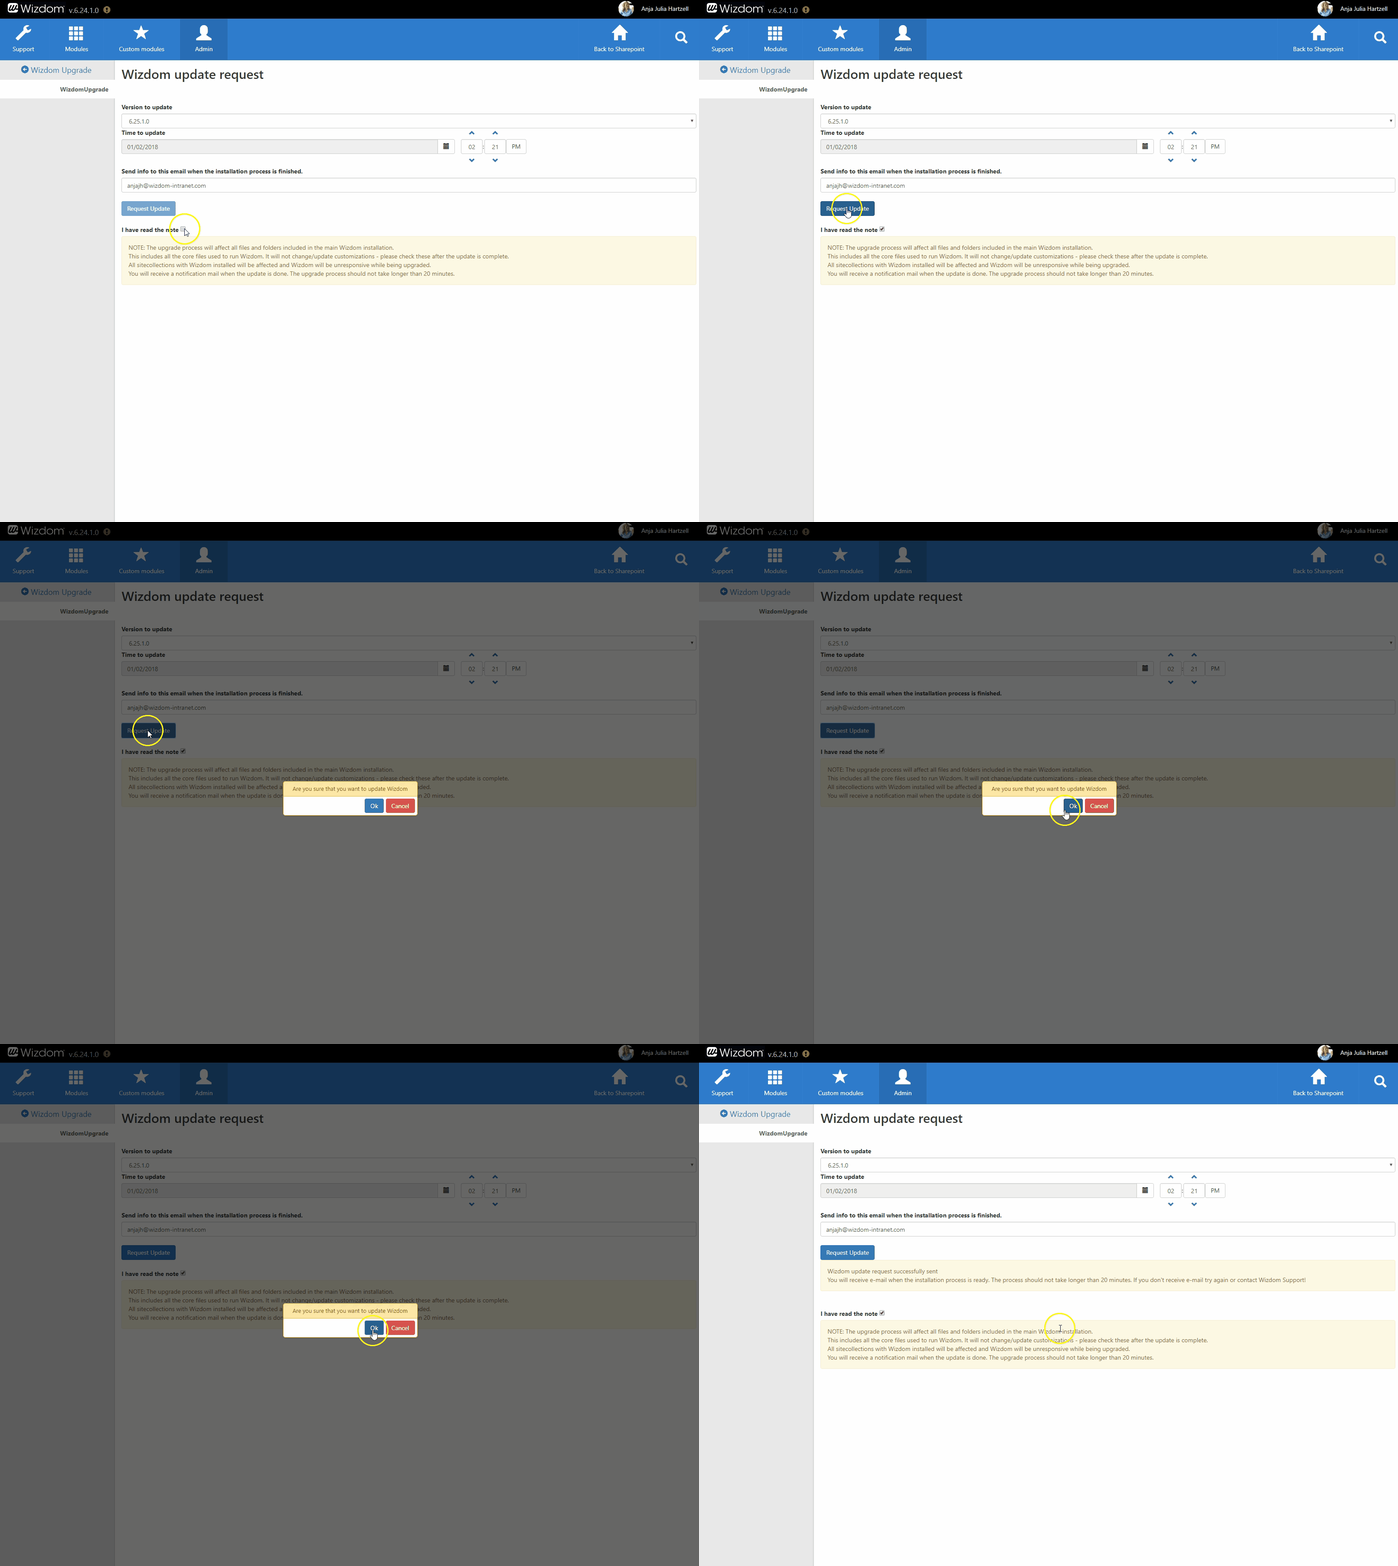
Finally, click ‘Request Update‘ to start the upgrade of your Wizdom solution. Before you can set the upgrade in process, you need to confirm that you have read the note with important information about upgrading Wizdom.
After the upgrade
After the upgrade process is finished, a notification email will be send to the email address you’ve entered on the upgrade page. Your Wizdom intranet will, again, be available for all users and the version of Wizdom displayed in Wizdom Configuration Center should correspond with the version you’ve just updated to.
NOTE: The upgrade will not change or update customizations. Therefore, if you have customizations in your solution, we recommend you to check these after the upgrade process is completed.


