Introduction to the Learning & Events module and its user interface
Introduction to Learning & Events
Streamline and automate the handling of training courses and company events.
The Learning & Events module covers every major function in the event planning life cycle.
The application creates an easy-to-grasp overview of all courses and events, and manages registrations, deregistrations, waiting lists, and the communication before and after events and courses.

User interface from the end user’s perspective
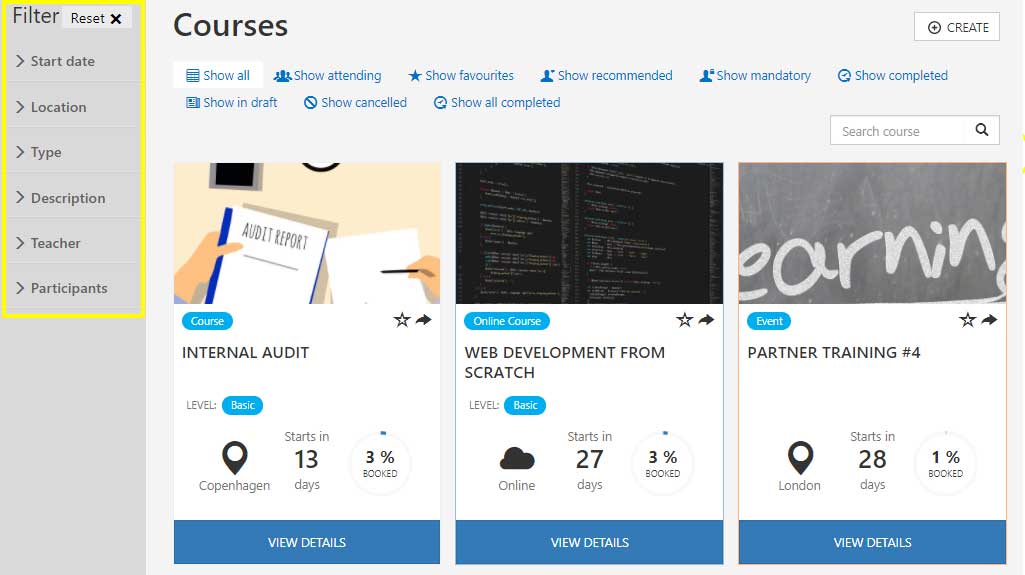
A high-level, role-targeted overview of all courses provides users with a quick and easy way to identify relevant activities. Using powerful filters, search results can be rapidly narrowed down.
Marking Courses as Favorites
By clicking the star icon on an event card, users can mark activities as favorites. This helps users easily retrieve relevant activities.
Activities already marked as favorites will be shown with a solid star. Clicking the star icon again, will unmark the activity as a favorite.
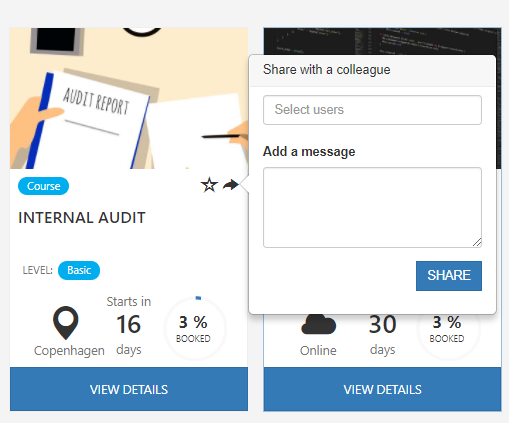
Sharing Events
Clicking the arrow icon on an event card allows you to share the activity with a colleague. The colleague then receives an email with the composed message and link to the event.
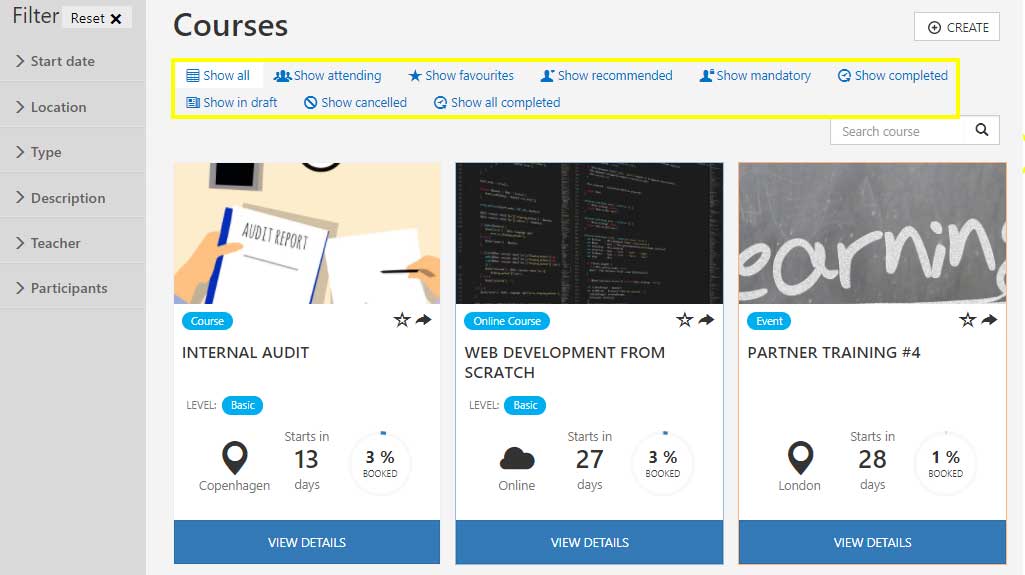
Pre-defined Filters
A list of pre-defined filters in the top of the course overview allow you to quickly find courses by narrowing down search results. Three of the filters are only visible for teachers, organizers, and administrators.
Show all shows all future courses you are allowed to see.
Show attending shows all the courses you’ve signed up for.
Show favourites shows all the courses you’ve marked as favorites.
Show recommended shows all the courses, you are recommended to attend.
Show mandatory shows all the courses, you are expected to attend.
Show completed shows all your completed courses.
The last three options are only visible for teachers, organizers, and administrators:
Show in draft shows all courses with status draft.
Show cancelled shows all cancelled courses.
Show all completed shows all completed courses.
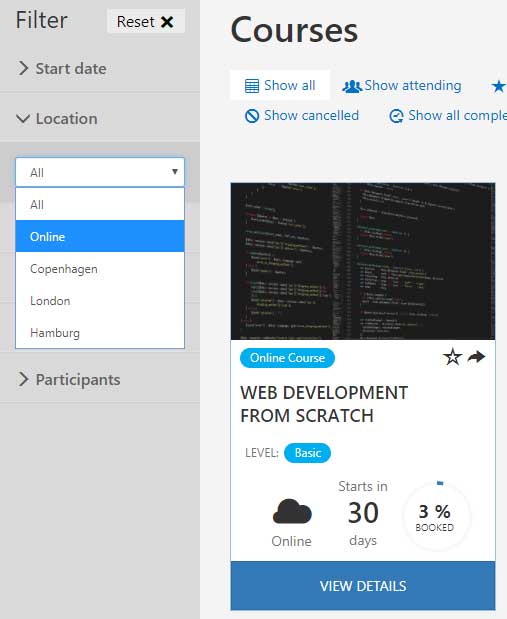
Advanced Filters
Using the advanced filtering features in the left side of the course overview, its possible to further narrow down the search results.
The filters are defined by metadata that are specified in the module administration. In this way, these filters can be customized to match individual business needs.
Event Registration
Selecting an event from the overview, users are met by a descriptive landing page featuring all information needed for a user to decide whether to sign up to a course, be added to the waiting list, sign up colleagues, or cancel sign up.

Signing up
A user can sign up for an event or course, when there are available places, the registration date is not reached, and the course is not marked by the course administrator as ‘Only for pre-invited‘.
Unless the course is marked ‘Allow external users’ (course administrators can override these rules), external users can not sign up for an event or course.
By clicking the ‘SIGNUP’ button on the event landing page, a dialogue box will take users through the sign up process. Users can choose to compose a message to course teacher(s) when signing up.
After the sign up, a confirmation email is send to the user together with a calendar invitation. If the wizdom installation is not configured to use a SMTP server for email, the calendar invitation can be downloaded by the user instead.
NOTE: If a course admin signs a user up for a course, the user will NOT receive a confirmation email. This only happens when the user signs up for the course or is signed up for the course by a colleague who is not course admin.
Sign up Colleague
A user can sign up colleagues for a course or event, by clicking the ‘SIGNUP OTHERS’ button, under the given three circumstances:
1) The course or event is marked as ‘Allow member to add colleague’
2) The user has already signed up for the same course or event.
3) The ‘Participants’ role should be configured to allow users to add users to own role. When clicking the ‘SIGNUP OTHERS’ button, a sign up dialogue lets you find and pick one or more colleagues to invite. In the sign up process, you can choose to compose a message to the course teacher.
The users, you invite, will receive a notification email and calendar invitation. If the wizdom installation is not configured to use a SMTP server for email, the calendar invitation can be downloaded by the user instead.
Waiting List
When the maximum number of participants is reached for a course or event, users can sign up to the activity’s ‘waiting list’. If a participant cancels his or her signup, the next in line on the waiting list is automatically moved to particiants and a notification of registration is send to the user.
NOTE: If the course admin moves a user from the waiting list to the participants list a notification email will NOT be sent to the user. This only happens when the user is automatically moved from the waiting list to the participants list.
Deregister
Deregistration can happen from the event landing page where the ‘Sign up’ button will change to ‘Cancel sign up’ once you are registered to the activity. After deregistering, you will receive an email confirming you cancellation.
NOTE: If the course admin deregisters a user, the user will NOT receive an email confirming the cancellation. This only happens when the user deregisters.

User Interface from the course administrator’s perspective
Create Activities
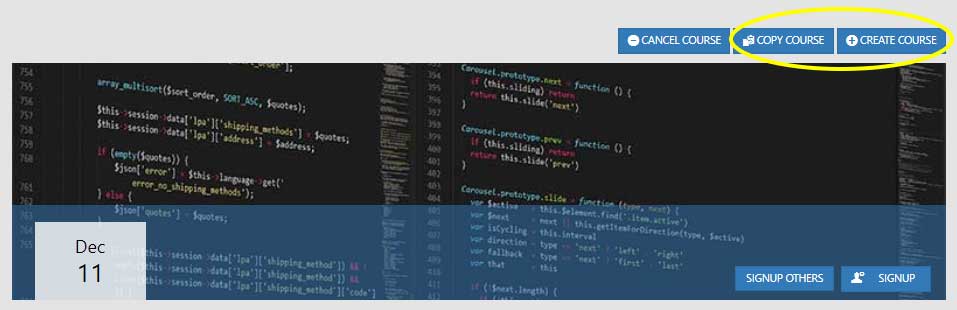
Administrators can create new events from the overview.
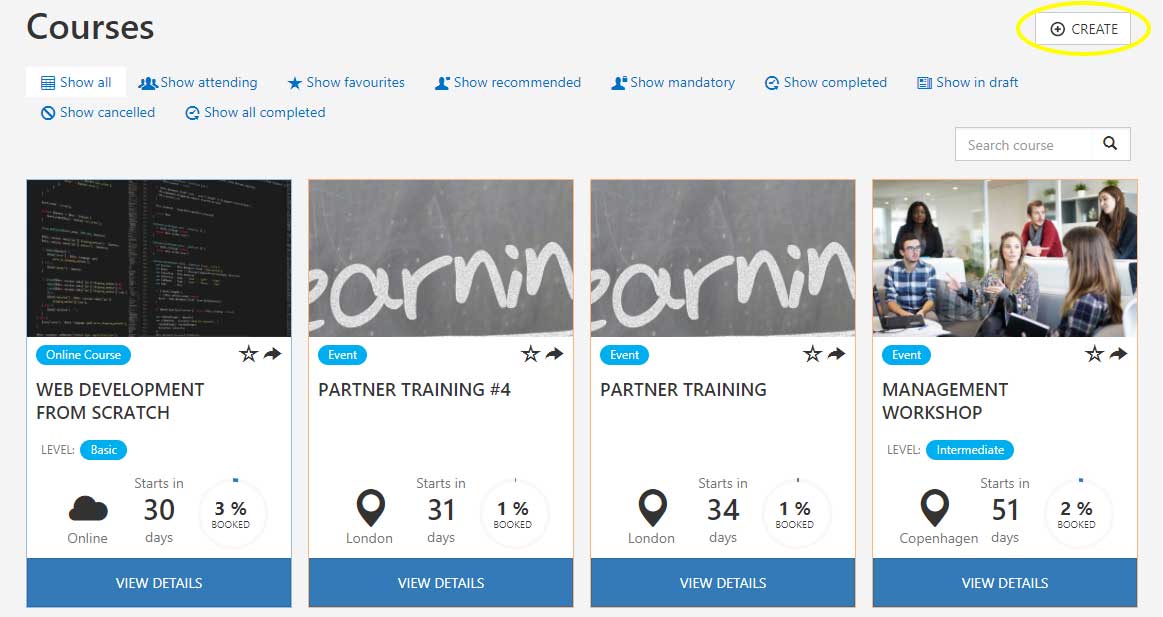
Or from event landing pages, where administrators can, also, create new events by copying established events. By copying an established event, all data from the copied event will be dublicated to the new activity.
Creating an activity, administrators will be taken to a process of defining metadata, settings, and roles of the activity.
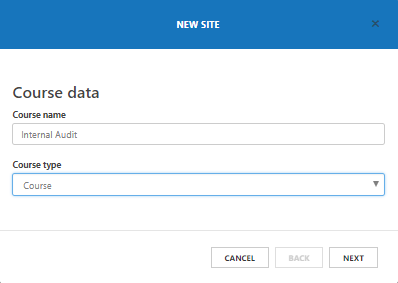
First:
Course name defines the title of the course.
Course type lets you choose between activity types defined in the module administration. Standard types are ‘Event’, ‘Course’, and ‘Online Course’.
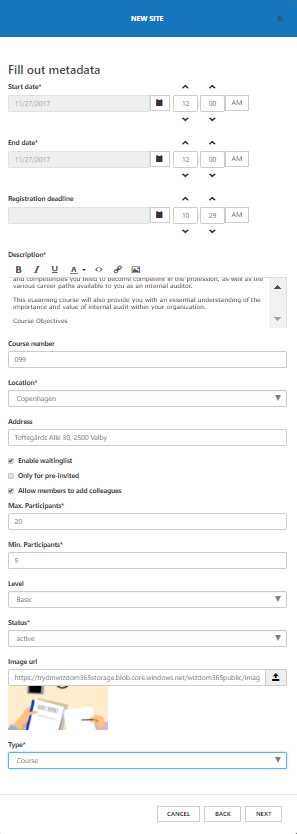
Next:
Start and end date is where you set start and end date of an activity.
Note: The module supports custom development that allows for course programmes whose progress are interrupted by e.g. dates of home study, and, therefore, has several start and end dates
If Registration deadline is not filled in, registration will close the day the activity begins.
Description lets you write a detailed description of the event or course.
Course number offers you to specify a course number.
Location provides a drop down tool to select overall company location for the event – e.g. in which country the activity is offered or whether it is held online or IRL.
In Address you type the specific address of the event location.
Ticking Enable waiting list will allow users to sign up for a waiting list for the event.
Only for pre-invited will allow you to create events that users can’t sign up for. Instead, event admins will completely control the sign up process by registering attendees.
Ticking Allow members to add colleagues will allow users to add colleagues as attendees to a course.
Max. participants limits how many users that can sign up for the activity.
Min. participants defines how many users the activity require in order to be initiated.
Level lets you select level for the course beween a list of levels defined in the module administration.
Status lets you select status of the activity from a list of predefined values: draft, active, completed, and cancelled. When a course or event has exceeded its end date, the status of the course or event will automatically change to completed.
In the Image URL field, you can select an image from your computer to illustrate the activity. If no image is selected a standard image will be displayed.
Type lets you select the tag, that will trigger the activity, when users use the event type filter to search.
Finally, you are asked to assign roles for the activity:
Relevant for allows you to mark activities as relevant for users. This will make the activity appear when the user filter activities by clicking ‘Show Recommended’.
Mandatory allows you to mark activities as mandatory for users. This wil make the activity appear when the user filter activities by clicking ‘Show mandatory’.
Organizer is where you define who will be organizer of the activity. The organizer will have administrator rights of the activity. The user who creates the activity is organizer per default, this, however, can be changed.
Teacher is where you set teacher of the course.
Participants as an organizer you can sign up attendees from here. If the activity is only for pre-invited, this is where you define attendees.
Visible for defines the users or group of users that will have permissions to see the activity.

Manage Attendees
Course administrators can manage attendees by registering users as participants, canceling sign ups, and, by and large, freely move members from any list to another.
This is done from the course landing page. Here, course administrators can, also, print out and export attendee lists, and communicate to participants by emailing from an integrated email function.
NOTE: The admin function overrides all automatic processes of the module. Therefore, when course administrators move users from one list to another, e.g. from the waiting list to the participants list, sign up, or remove users from a course list, an email notification will NOT be sent to these users. This only happens when the users themselves, or an automatic function, sign up, remove, or move users from one list to another.
Manage attendees from the ‘Participants’ web part.
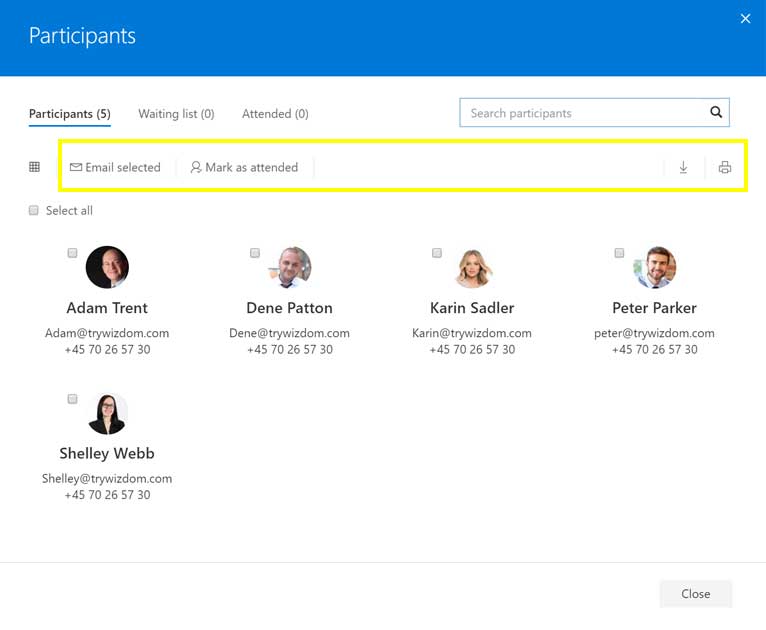
From the ‘SHOW ALL’ button in the bottom of the ‘Participants’ web part, course administrators can access tools to email attendees or users on the waiting list, register when users have attended a course and export, and print the attendee lists.
Attendance tracking
Keeping track of attendance is an important part of the event management function. Therefore, the Course Management module gives course adminitrators tools to note which users did and didn’t attend a course or event that he or she was signed up for.
This opens for statistics on attendance and enables course administrators to evaluate on turnout.
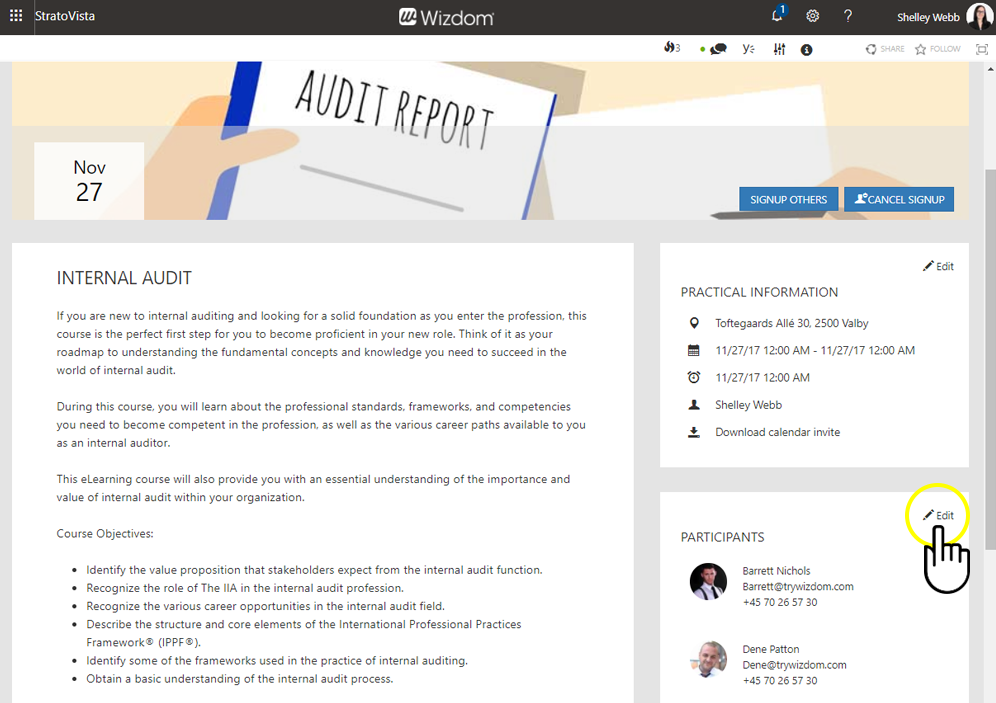
Edit Roles
From the ‘Participants’ web part, course administrators, also, edit roles of courses and events. E.g. administrators can add more teachers, change course organizer, or move users from waiting list to participants.

Edit Activities
As a course administrator, you can edit details and setting of courses and events at any given time. This happens from the event landing page.
When you have changed details or settings, an email will automatically notify attendees of the changes by email – unless you deselects this option.
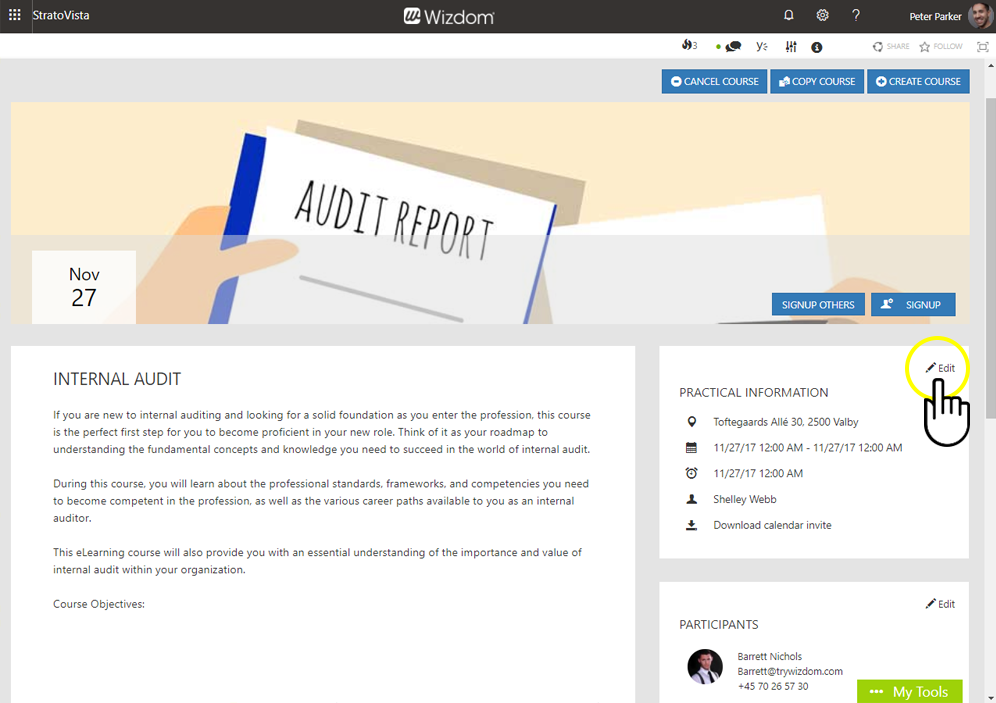
Change activity details and settings from the ‘Practical Information’ web part.