Introduction to the Service Desk module
Introduction to the Service Desk
Supporting the entire process of a support request, Wizdom Service Desk offers an automated support request management workflow that helps employees and support teams submit, monitor, and manage support tickets.
The Service Desk from the user’s perspective

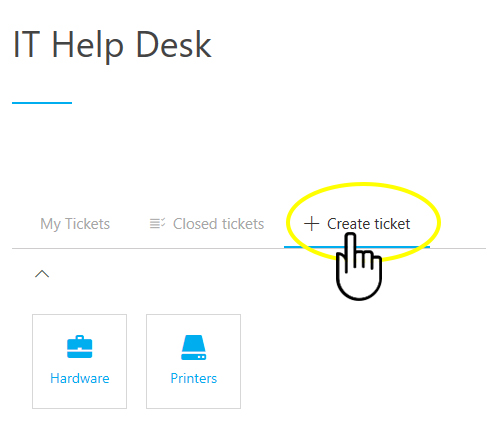
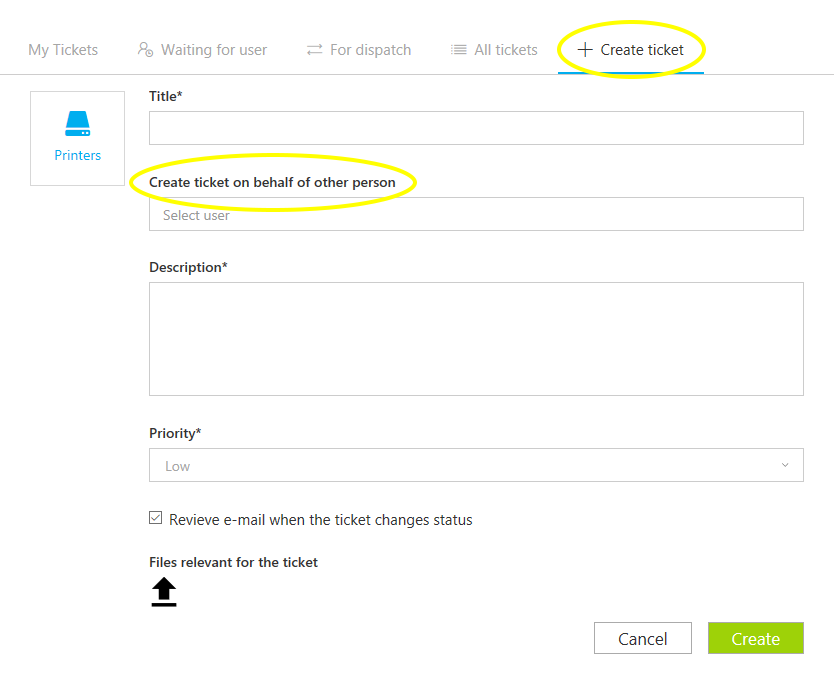
Users submit tickets from the relevant service desk by performing a few intuitive actions:
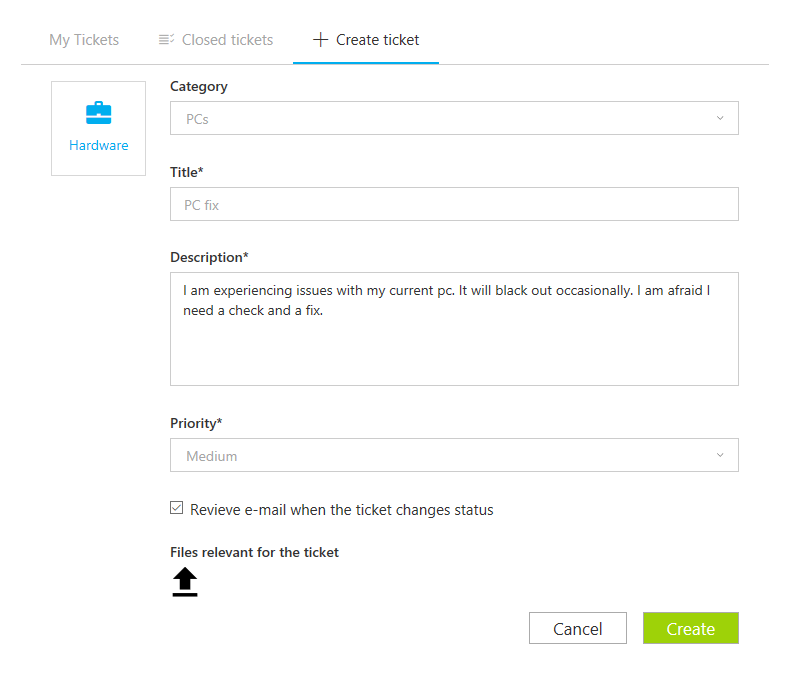
1) When clicking “Create ticket”, the user can choose between categories defined for the service desk.
3) The field “Receive email when status of your ticket changes” is ticket per default. When ticked, the user will receive email notifications when a supporter comments the case, provides a solution for the case, or changes state of the case.
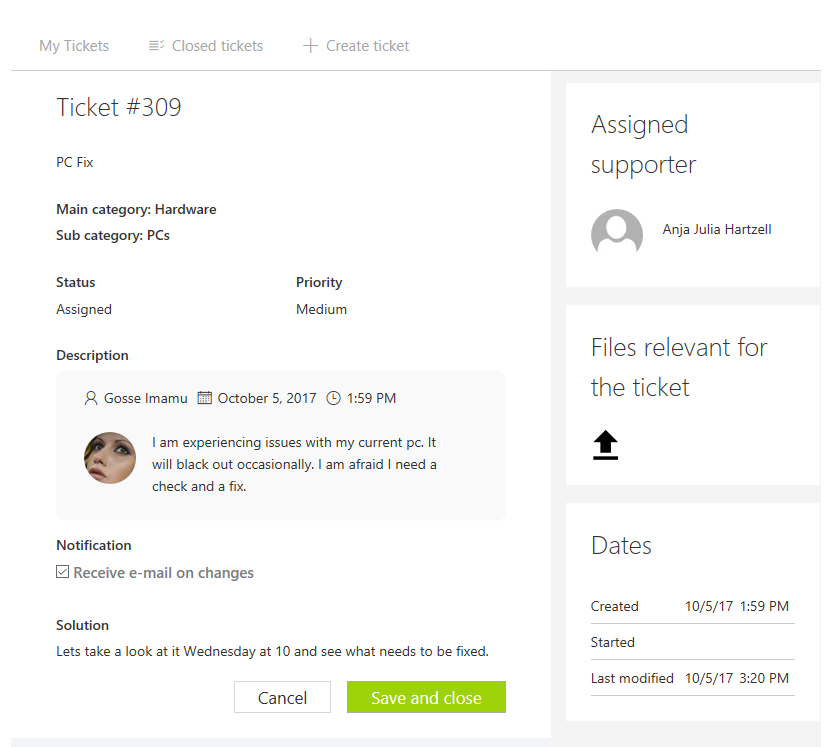
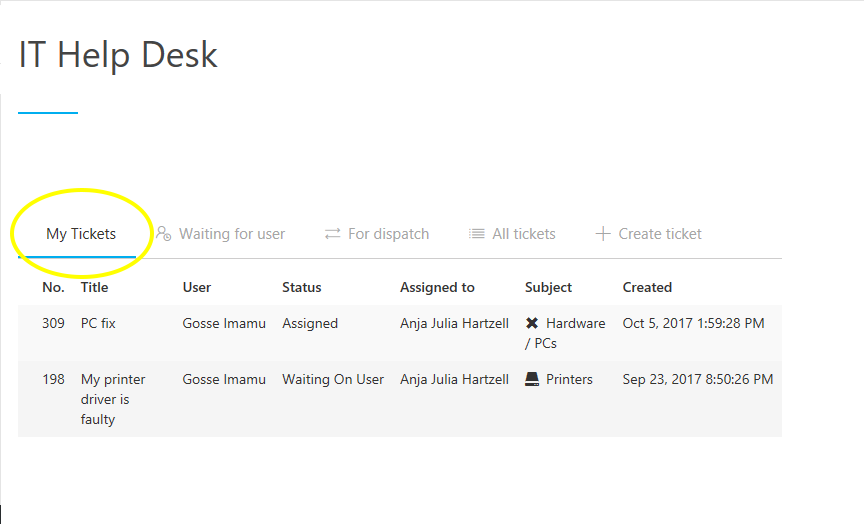
Wizdom Service Desk allows the user full insight to his or her request.
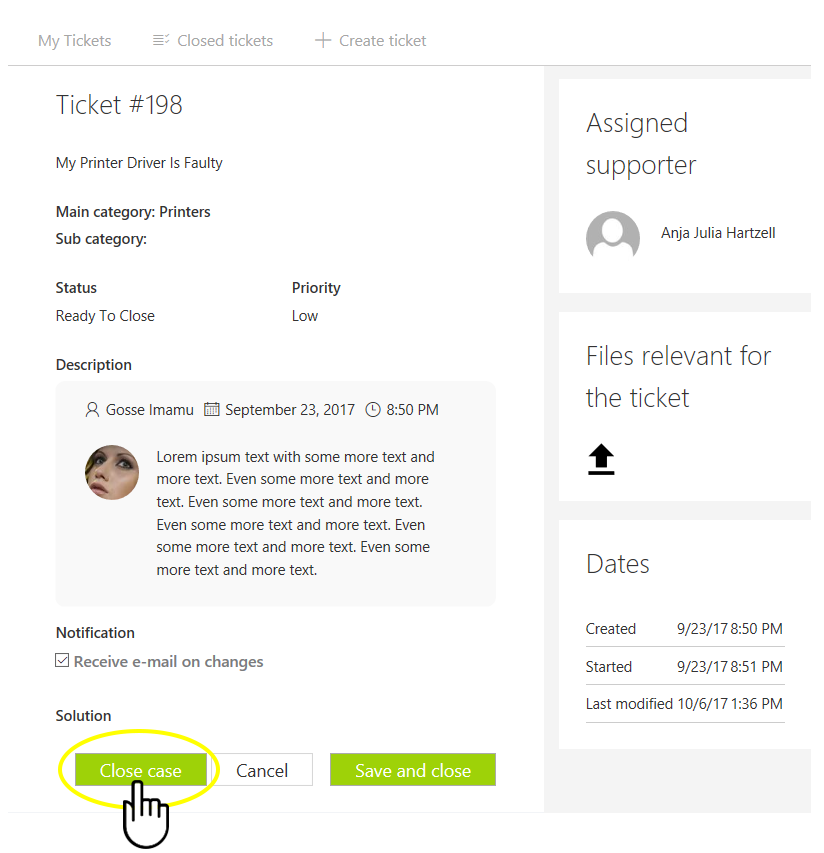
For each ticket, the user has access to an overview of the ticket with details like assigned supporter, ticket state, relevant files, comments, and proposes solution to the ticket.
When a supporter set the state of a ticket to “Ready to close”, it enables the user, who created the ticket, to close it from the ticket’s overview.
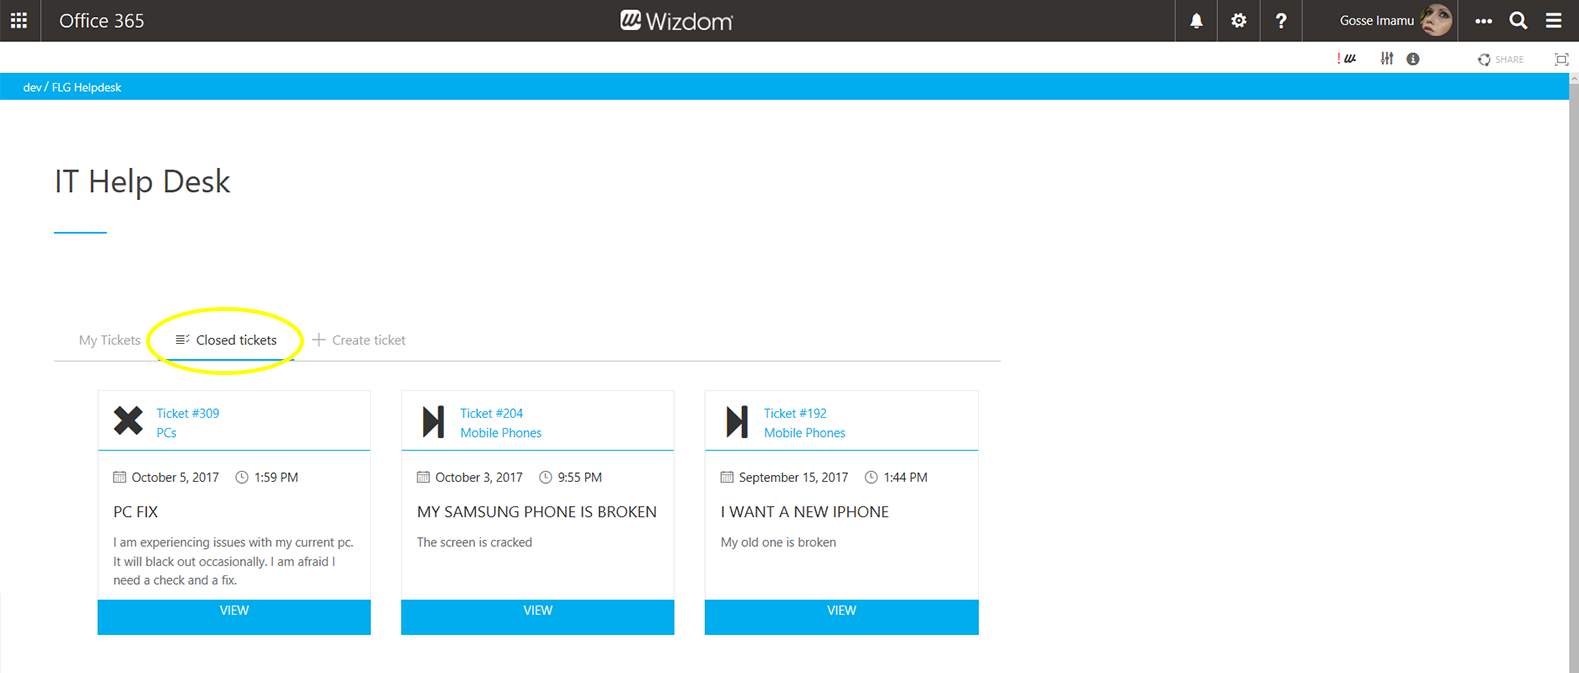
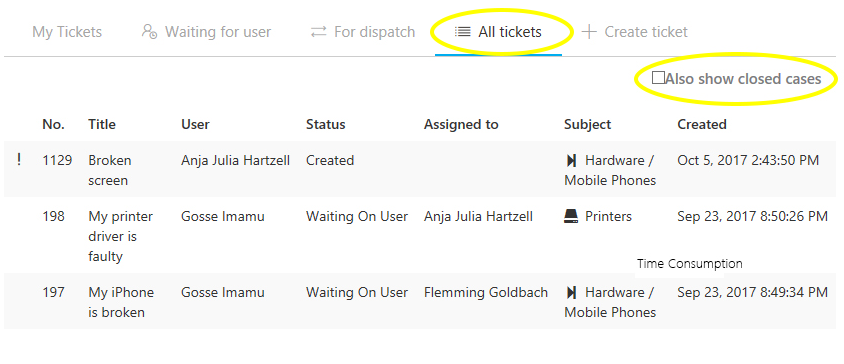
After a ticket is closed, the user can access the ticket and its details under “Closed tickets” from the service desk’s landing page.
The service desk from the supporter’s perspective
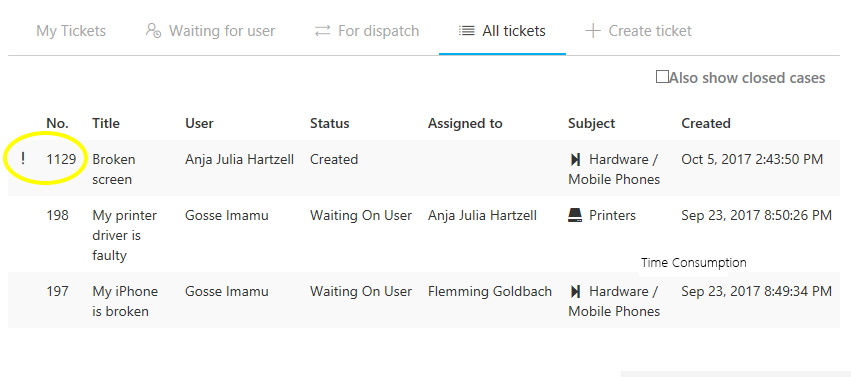
“For dispatch” displays cases that are not yet assigned to a supporter. From here, a supporter with the role “Super supporter” can assign tickets to relevant supporters.
Handling an Assigned Ticket
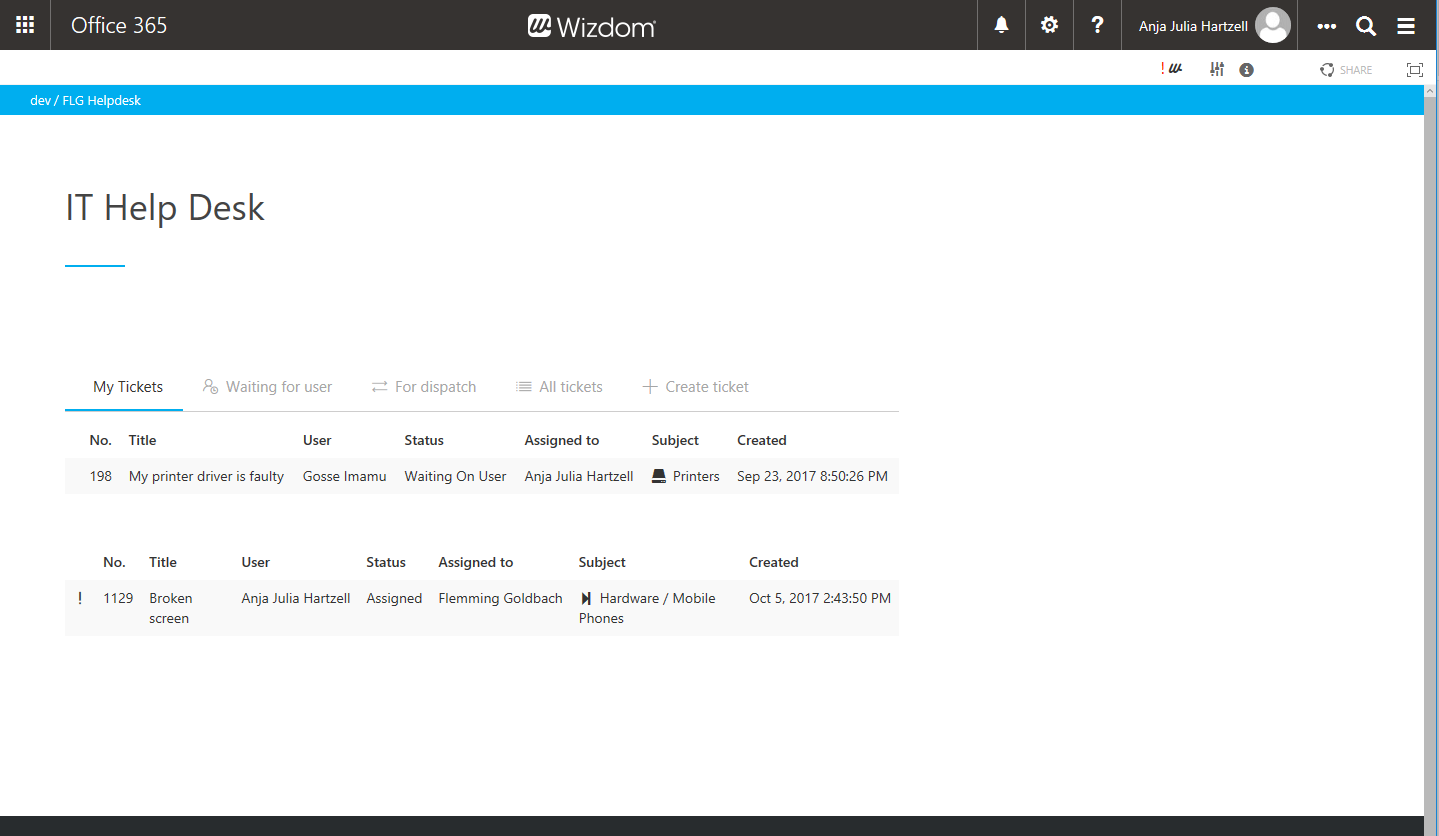
When a supporter is assigned a ticket, the supporter will receive an email notification about this. Also, the supporter will, now, see the ticket in the overview under “My tickets”.
By clicking on the ticket in the overview, the supporter will enter an interface with all details about the ticket and tools to manage it. From this view, the supporter performs all support actions.
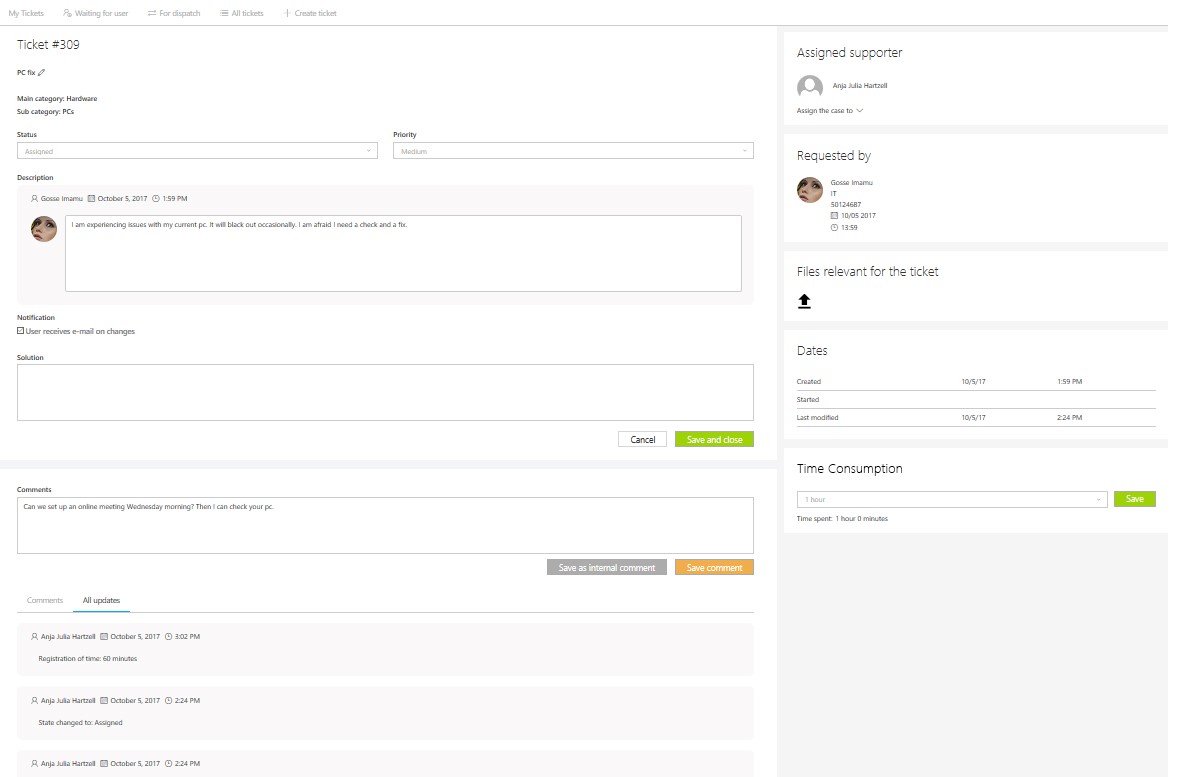
When submitting a request, the user defines the priority of the case to either low, medium, or high. This priority can be changed by the supporter.
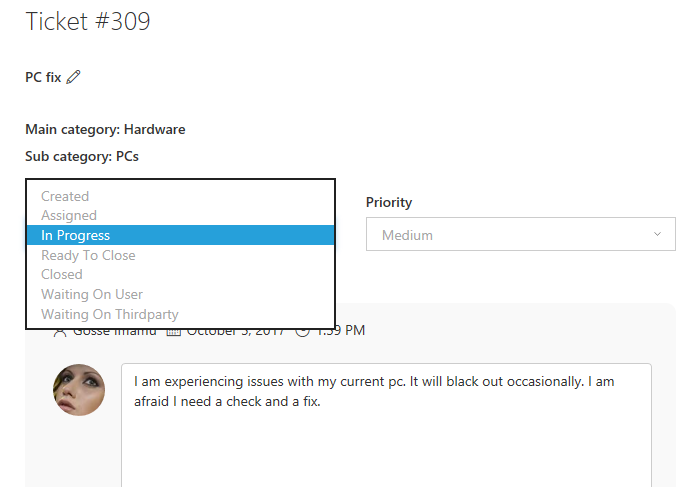
To change the priority of a case, the supporter uses the drop-down menu in the top of the ticket overview.
If the supporter will refer the ticket to a colleague, the supporter can assign other supporters to the ticket. This is done in the top of the ticket overview, by selecting the relevant supporter.
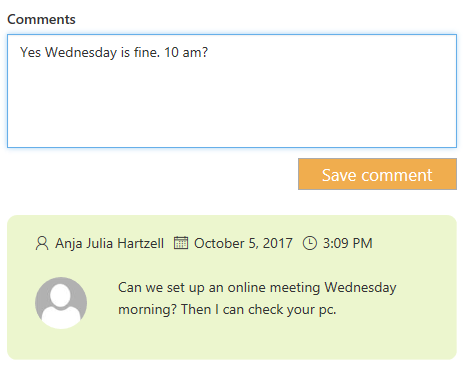
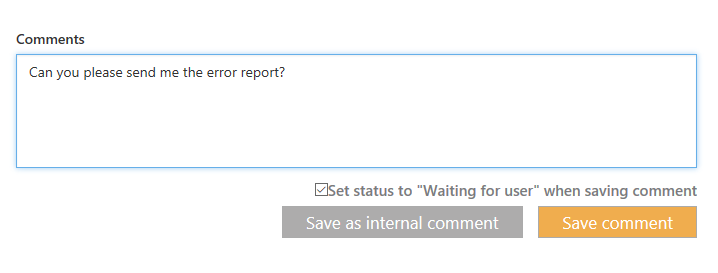
When commenting a ticket, the supporter fills in the field “Comments”. A comment can either be a comment to the user or an internal comment. If the supporter clicks on “Save as internal comment”, the comment will be seen by other supporters, but not the user that has submitted the ticket. If the comment is simply saved, user as well as supporters can see the comment.
Providing a Solution for a Ticket
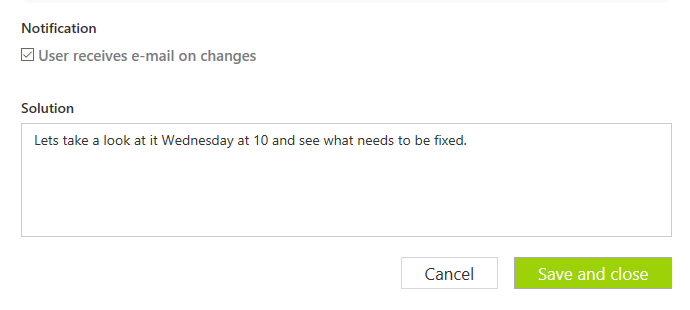
When communicating a solution to the user, the supporter fills in the field “Solution”. Per default, the user will receive a notification by email, letting the user know that a solution has been provided. If the supporter doesn’t wish the user to receive an email notification about the solution, he or she would need to untick the notification box, which is ticked per default.
As a case evolves, a ticket will change from different states between created and closed.
To change the state of a case, the supporter uses the drop-down menu in the top of the ticket overview.
When a supporter finds a case solved and ready to be closed, he or she can set the state of the ticket to either “Ready to close” or “Closed”. If a ticket is set to “Ready to close”, the user, who has requested the ticket, will be asked to close it. If the ticket is set to “Closed”, it will be closed right away and considered solved.
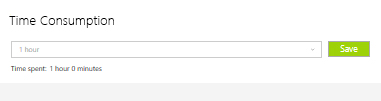
Time recording provides a tool to better understand how much time a supporter takes to solve tickets.
By the means of a simple drop-down menu in the ticket overview, the supporter can record the time spend on each ticket.
States of the Ticket
Different states of the ticket solving are reflected in the ticket’s states. In this way, the user can follow the course of the ticket solving, and the supporters can keep track of what is happening with the internal service delivery.
Wizdom Service Desk provides the following states:
Created, the initial state of the ticket when it is first created.
Assigned, the state of the ticket when it is assigned to a supporter.
In progress, the supporter has initiated the ticket solving.
Ready to close, the supporter finds the ticket solved and ready to be closed by the user.
Closed, the ticket is solved and closed either by the user or the supporter.
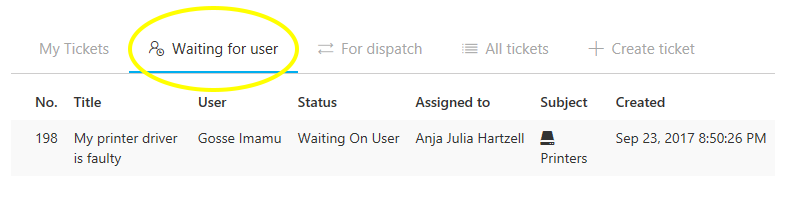
Waiting on user, the supporter is waiting for the user to respond.
Waiting on third-party, the supporter is waiting for a third-party to respond.
In two scenarios, this state change will happen automatically:
1) When the case is assigned to a supporter it will automatically change from “Created” to “Assigned”.
2) When a supporter sends a comment about a ticket to a user, the state of the ticket per default changes state to “Waiting for user”.
In all other scenarios, the states are changed manually.