[printicon align="left"]
License module settings
In this article
Adding the license
To upload the new license in Wizdom, it is recommended to use the Chrome browser and remember to select the top right of the URL bar to load insecure code.
- Choose Admin and License and you will see the following page.
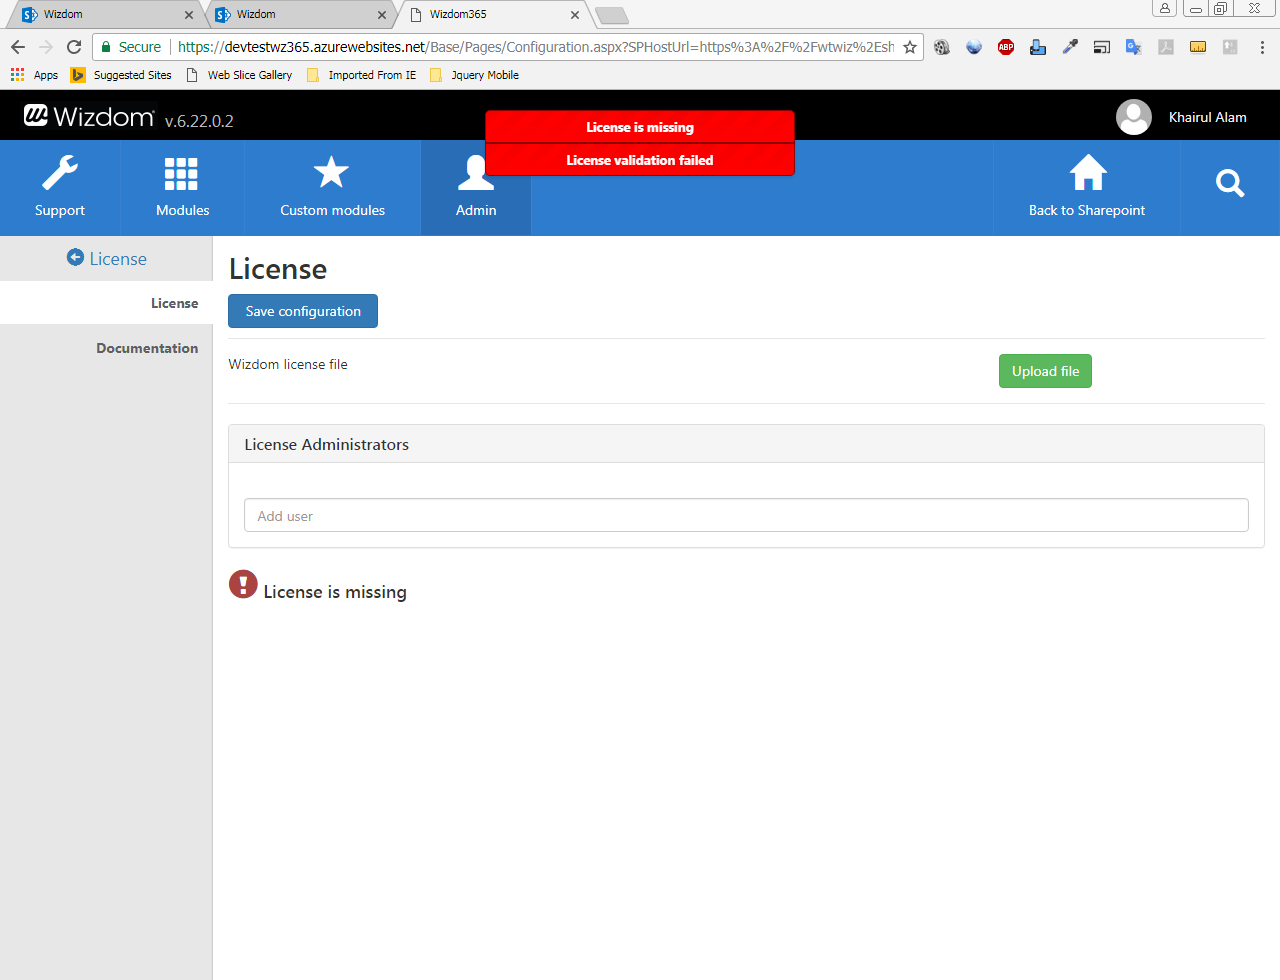
- Click on ‘Upload File’ button and select the license file
- Click ‘Save Configuration’
Adding license administrators
License administrators will get the license related notifications. Choose your administrators wisely, as these are the ones receiving e-mails with information regarding license expiration, for example.
To add License Administrators:
- Go to the Admin > License Page.
- Type few Characters of the tenant users
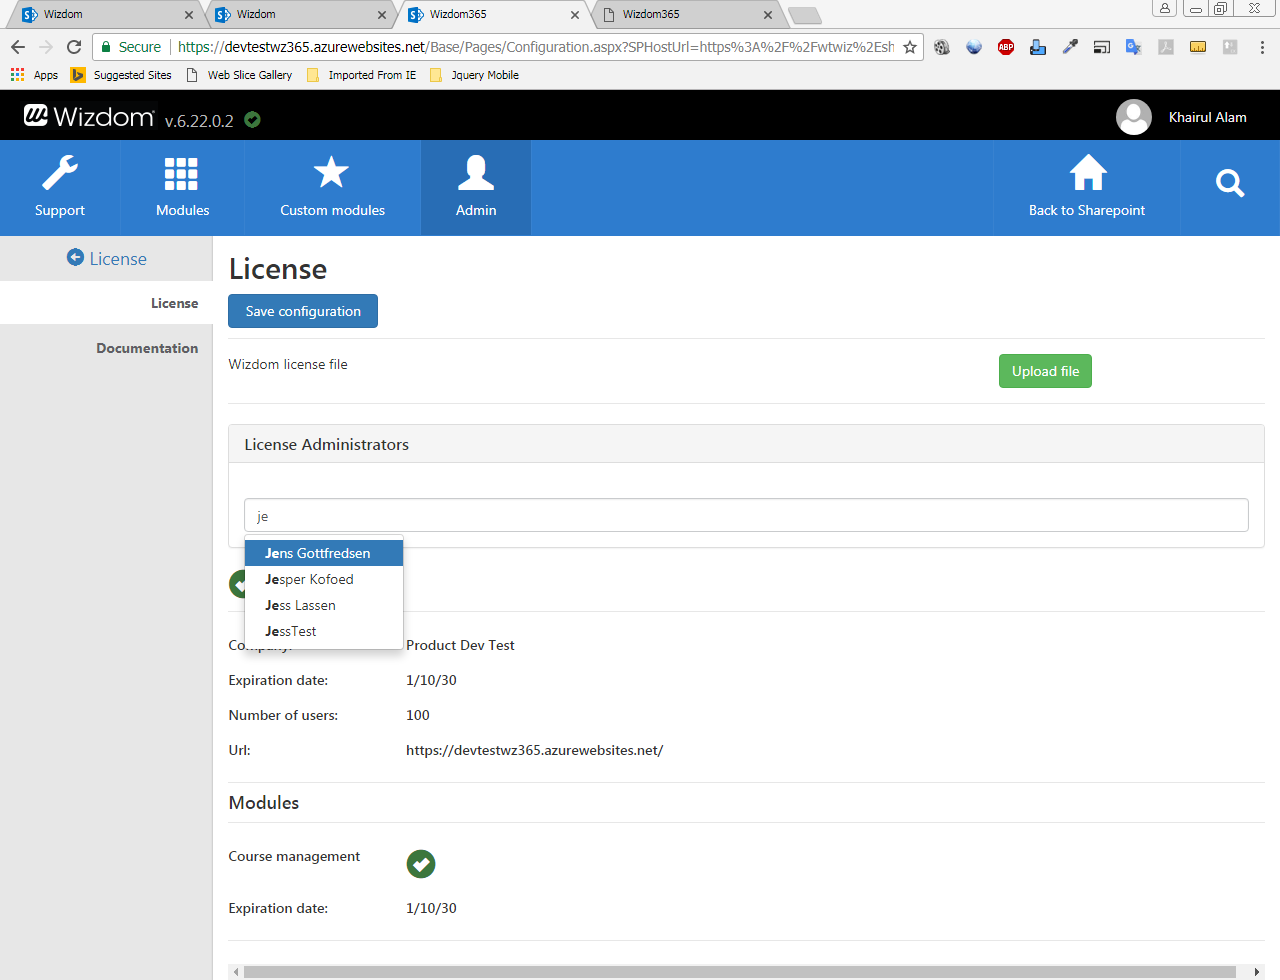
- Select user from the list
- Click on ‘Save Configuration‘ button
Valid license
License is valid when there is a green tick in the box and you have entered all the required information.
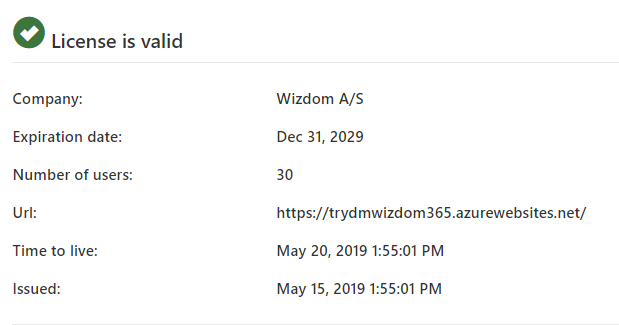
- First, your company name is presented.
- Expiration date states the date when the license expires definitely.
- Number of users indicate the number of users the license allows for.
- URL is URL of their web application in Azure where their Wizdom is installed.
- The Time to live timestamp indicates when license becomes stale. The timestamp is renewed everyday, once license timer connects with the server and detects a valid license. It updates the date each time it connects, but if not, time to live risks being exceeded, indicating that the license timer may not have connected with the server. If the installation believes the license is invalid it will mean that documentation cannot be retrieved.
- Issued indicates the date when the license has been issued.