Service Desk module settings
Top-level administration of Service Desks
Under ‘administration‘ in the Service Desk module, you have access to configure settings for service desks created in your solution. Here, you are presented to an overview of all service desks created.

1) Click on the service desk that you wish to set up.
2) Now, you are presented to a page with three tabs each offering options for configuration:
The first tab has the name of the service desk. Here you define who will have permissions to create tickets, who will be assigned the role “super supporter”, and settings regarding email messages send from the service desk.
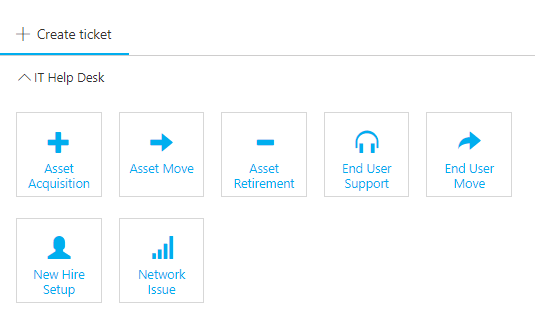
The tab, Categories, lets you define subjects for users to categorize support tickets when submitting requests. E.g. an IT help desk could operate with categories like Asset Acquisition, Asset Move, Asset Retirement, End User Support, End User Move, Maintenance, New Hire Setup, Network Issue, etc.
The tab, Metadata, lets you define data recorded for tickets created in the service desk.

Defining permissions and email settings
Defining permissions for a service desk and adjusting settings regarding email messages sent from a service desk
To define permissions for a service desk:
1) In the Service Desk module administration, click the Service Desk you would like to configure. Permission settings are located in the top of the first page you land on.
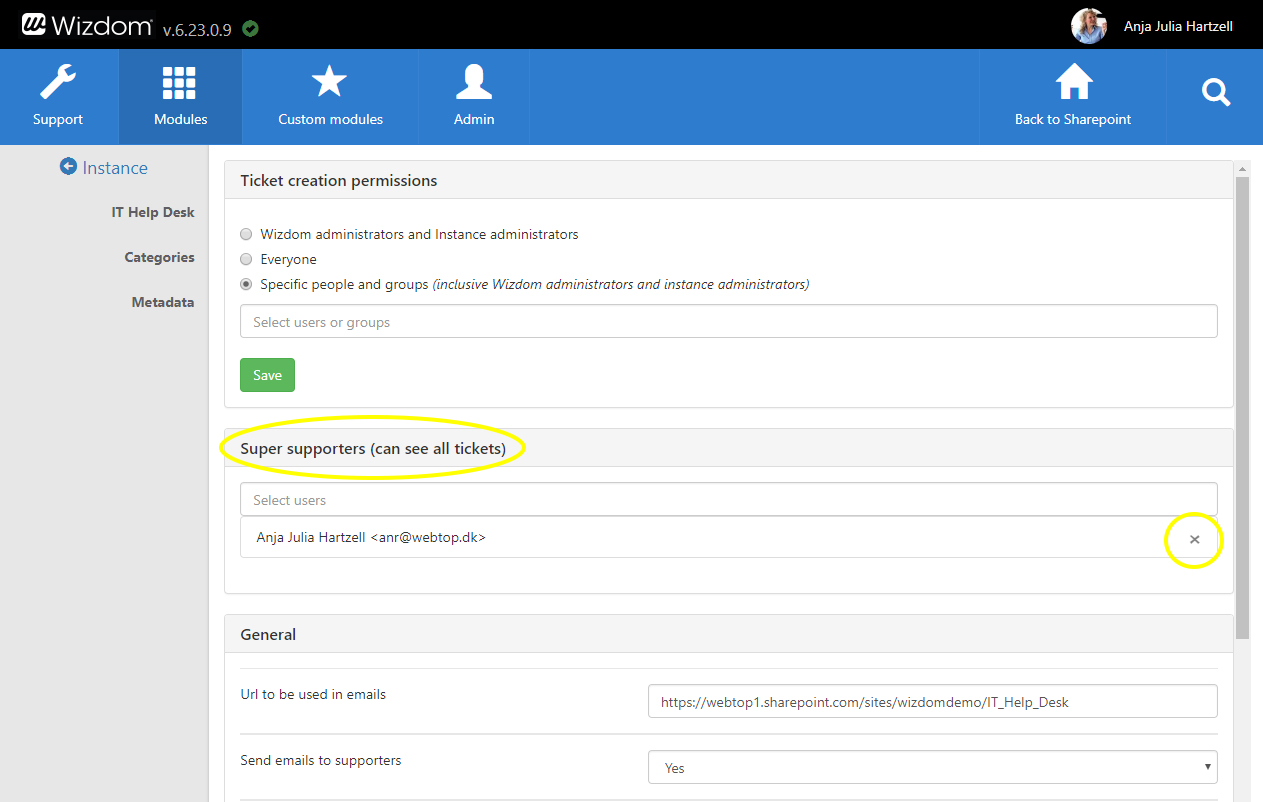
2) Under ‘Ticket creation permissions’, decide who will have permission to create tickets by choosing between three options: ‘Wizdom administrators and super supporters’, ‘Everyone’, or ‘Specific people and groups’. When selecting ‘Specific people and groups’, you are offered to find people or groups by search.

The user creating a service desk is assigned the role super supporter per default. If you wish to remove users from the role super supporter, simply click the cross to the right of the name.
To define settings regarding email messages sent from a service desk:
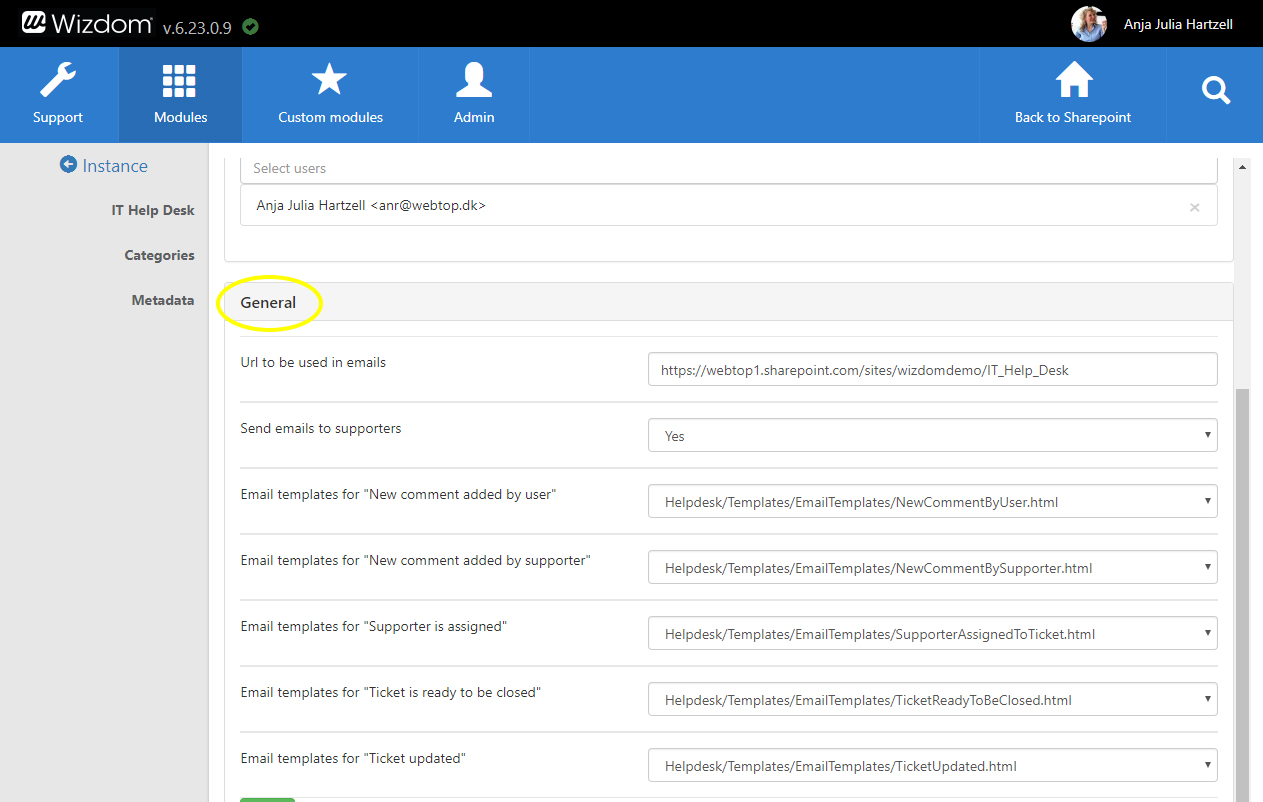
1) In the Service Desk module administration, click on the service desk you wish to configure. Email settings are located a bit down the first page you land on, under ‘General’.
2) Here, you define which web page emails, send from the current service desk, will link to (under “Url to be used in emails”), whether supporters will receive email notifications regarding tickets in the service
Defining service desk categories
Categories for users to categorize
To create new categories or edit existing:
1) In the Service Desk administration, click on the service desk you wish to configure.
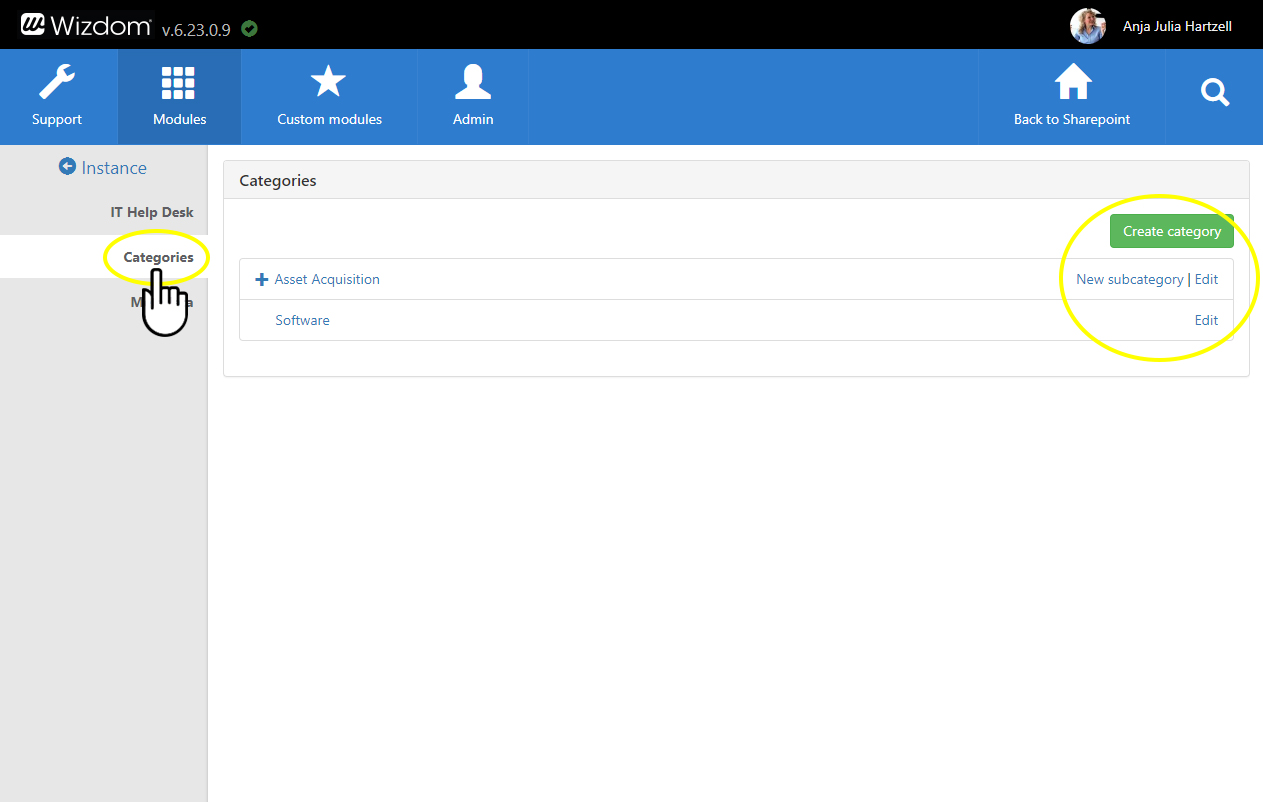
2) Click the tab ‘Categories’
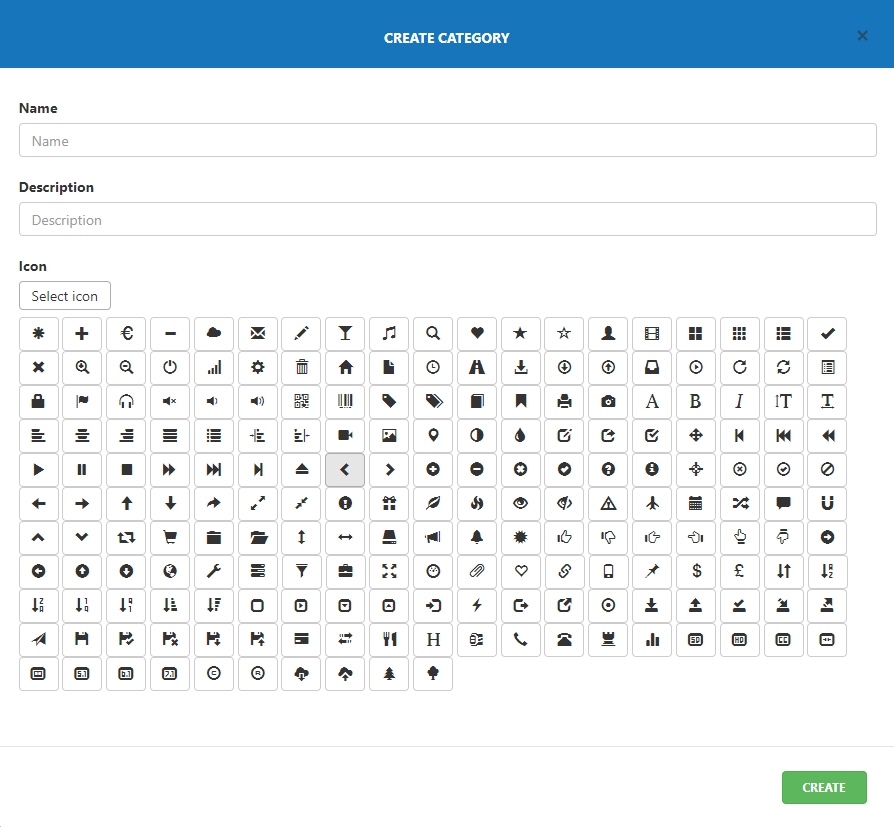
3) Click ‘Create category’ to establish a new category, click ‘Edit’ to the right of an existing category to edit it, or click ‘New subcategory’ to create a subcategory to an existing category.
Defining metadata for a service desk
Based on metadata defined, the service desk will present users and supporters to fields to fill in, during the ticket processing, that will ensure the appropriate data are recorded.
The service desk module includes a selection of pre-defined metadata that are mandatory for the module and its processes. In addition to these, administrators can create metadata to be used for specific service desks.
To manage metadata for a service desk:
1) Click on the service desk you wish to configure under the ‘Administration’ area in the Wizdom Service Desk module.
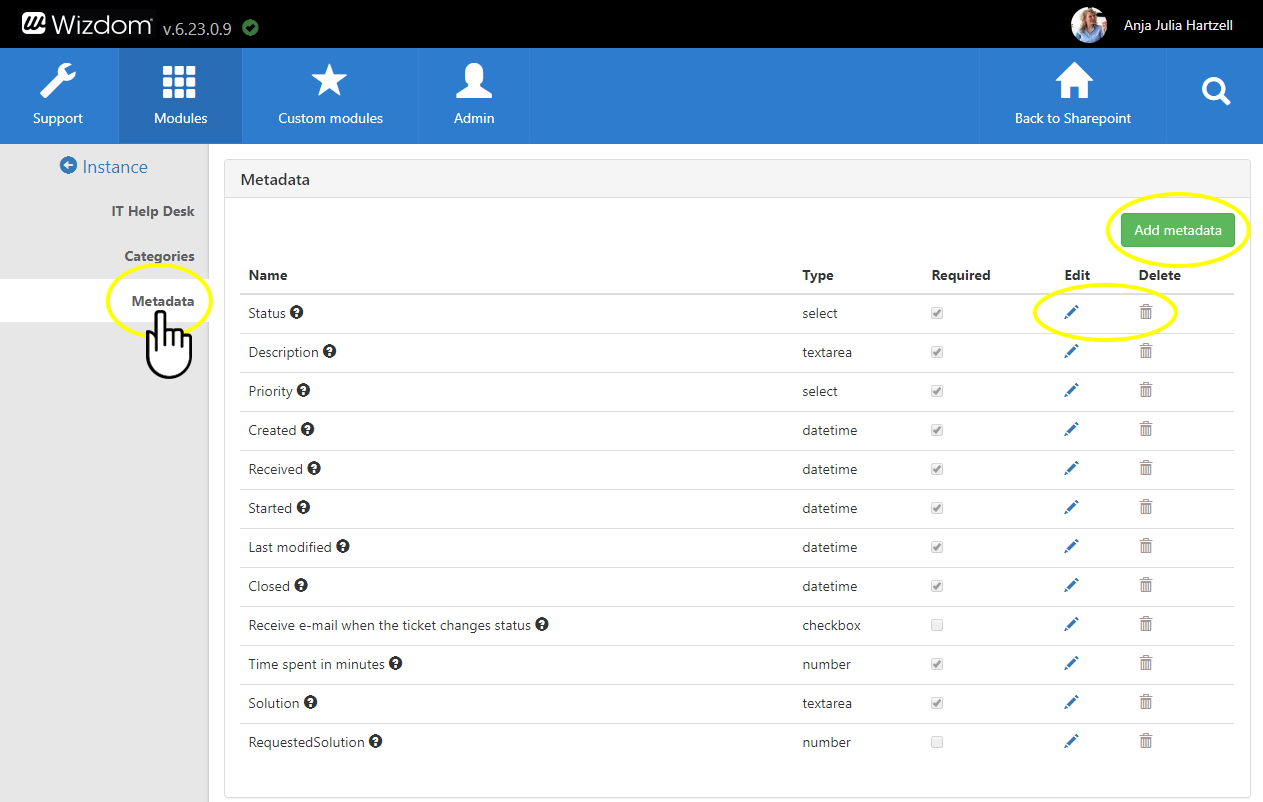
2) Click the tab ‘Metadata’
3) Click ‘Add metadata’ to establish new metadata, click ‘Edit’ to the right of an existing category to edit it, or ‘Delete’ to delete it. Some predefined metadata are mandatory and can’t be edited or deleted.
To manage metadata for a category:
1) Click on the service desk, you wish to configure, under the ‘Administration’ area in the Wizdom Service Desk module.
2) Click the tab “Categories” and then on the category you wish to manage metadata for.
3) This will lead you to a list of metadata for the category. Click “Add metadata” to establish new metadata, click “Edit” to the right of an existing category to edit it, or “Delete” to delete it. Again, pre-defined metadata are mandatory and can’t be edited or deleted.
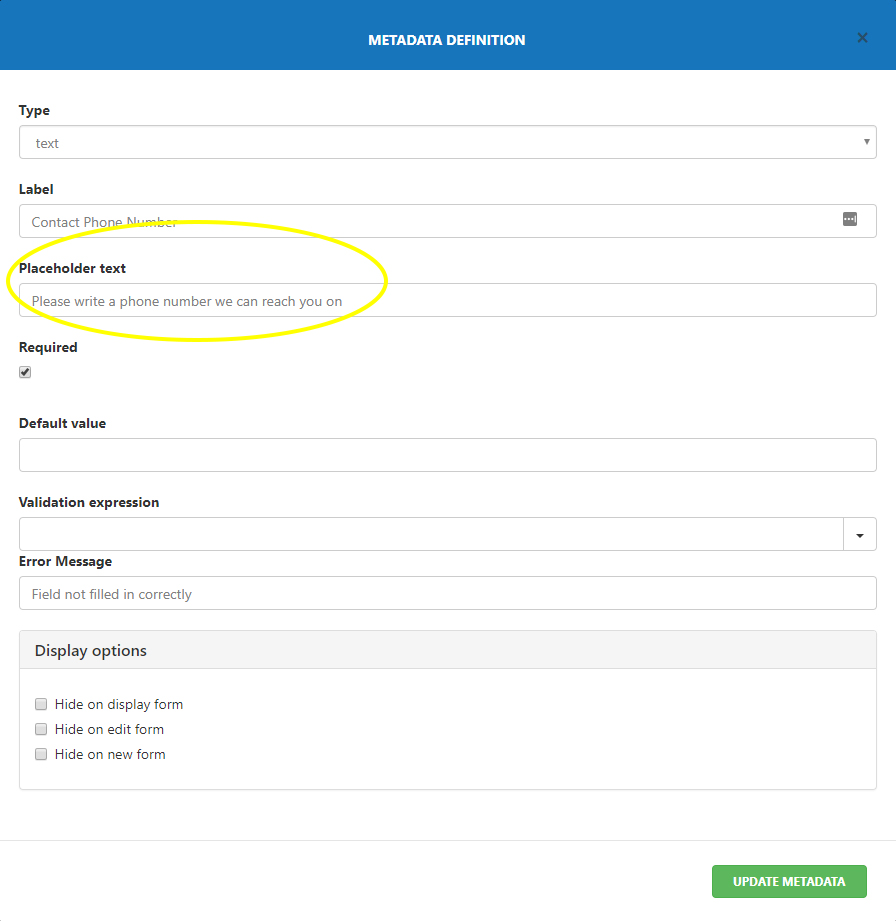
When creating or editing metadata, you are presented to a metadata definition window with a set of fields that let you define how the user or supporter will fill in the metadata.
Not all fields are present in all metadata definition windows as the fields, you will need to fill out for the metadata, depends on the type of the field.
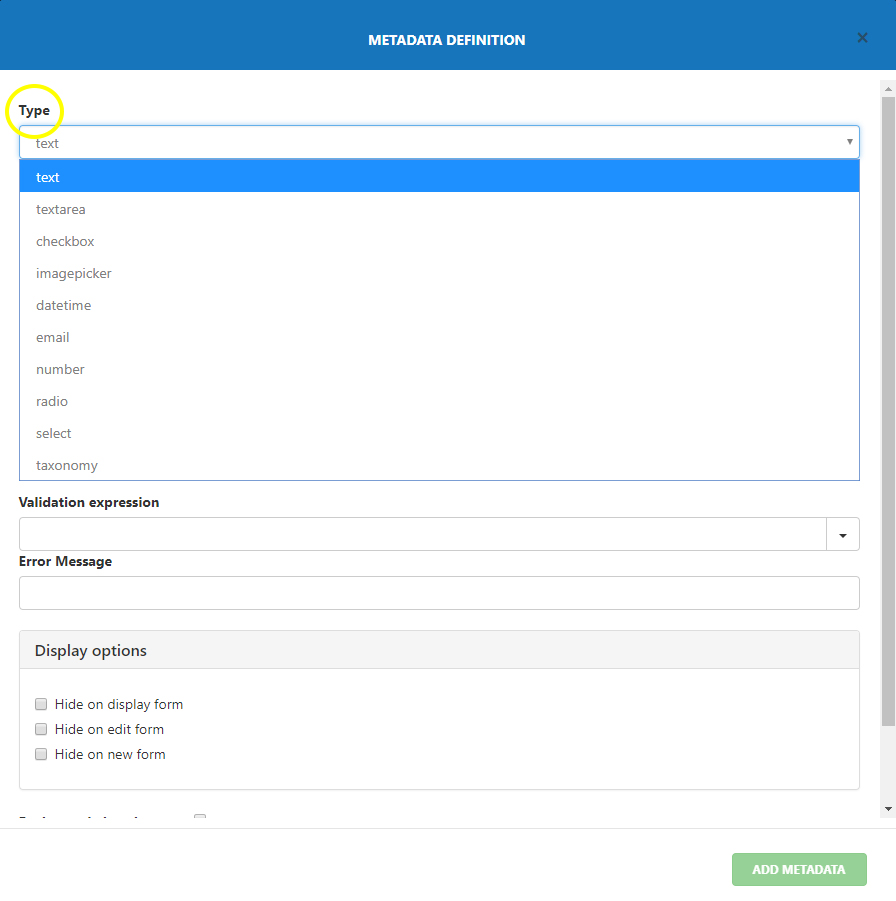
‘Type’ lets you decide which type of field that will be offered the user or supporter when they fill in the data about the ticket. You can choose between options as text, text area, checkbox, email, number, etc.


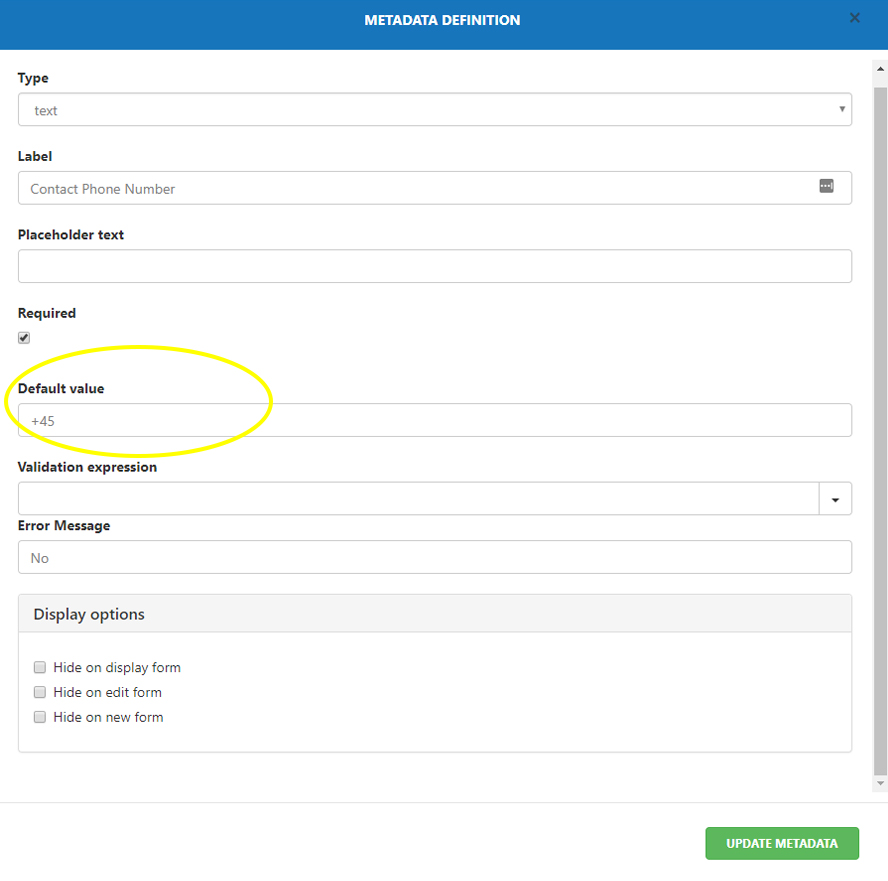
The text you fill in “Default value” will be the default text of the field where the user or supporter will fill in data. When filling in the data, the user or supporter can choose to change this text or to let the field be filled out with the default data. .

”Display options”enables you to hide custom metadata in either edit mode, on new forms, or on display forms. Note: This feature is currently not supported by the Service Desk module.
Ticking ‘HTML’ for a metadata field of a ‘textarea type’, will enable supporters and users to us use HTML in the text area and e.g. add pictures and links. If HTML is unticked, the text area will be for plain text only.
Ticking ‘Hide image preview in new and edit form’ for a metadata field of an ‘imagepicker’ type, will hide the image you have inserted as the default value.
Ticking ‘Date Only’ for a metadata field of a ‘datetime’ type means that the field will only supporters and users to fill in date, not time.
‘Minimum value’ and ‘Maximum value’ for a metadata field of a ‘number’ type lets you define the minimum and maximum values supporters and users can write in the number field.
‘Possible values’ for a metadata field of a ‘radio’ and ‘select’ type lets you define the options the supporter and users will choose between in a radio button or drop-down list field.
‘Term Set’ for a metadata field of a ‘taxanomy’ type lets you select a term set that administrators can use for tagging.
If you untick “Push to existing types”, the metadata field will not appear in cases where users submit tickets using subcategories. The field is ticked per default.
Configuring templates for the Service Desk module
The Service Desk module includes a selection of pre-defined templates.
You find an overview of templates for the Service Desk module under the ‘Templates’ tab in Wizdom Service Desk module administration.
From here, you can edit existing templates and create new.

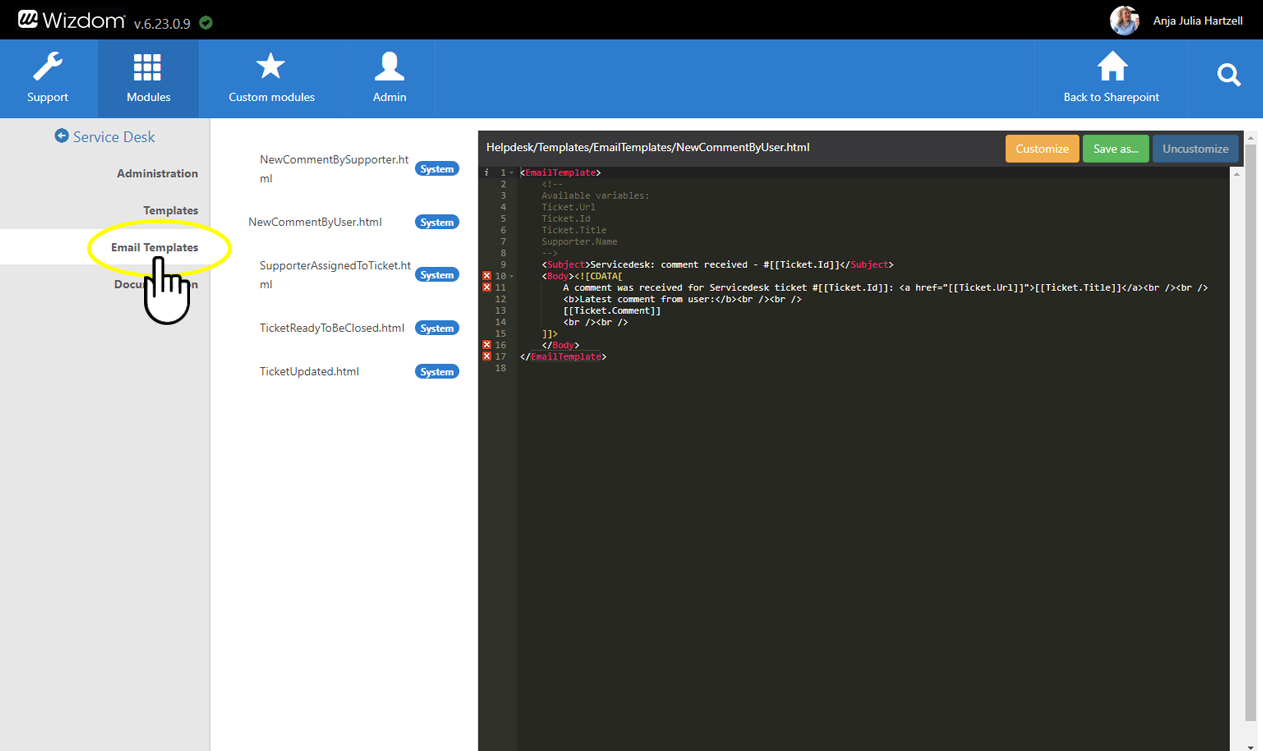
Configuring email templates for the Service Desk module
As part of the flow, users and supporters receive emails to notify of developments in the ticket processing. The service desk module comes with a set of five pre-defined email templates:
1) “NewCommentBySupporter.html” which is the email sent to a user when a supporter has commented a ticket the user has initiated.
2) “NewCommentByUser.html” which is the email sent to a supporter when a user comments a ticket the supporter is assigned to.
3) “SupporterAssignedToTicket.html” which is the email sent to a supporter when a ticket is assigned to him or her.
4) “TicketReadyToBeClosed.html” which is the email sent to a user when the supporter finds the ticket, the user has initiated, ready to close.
5) “Ticket Updated.html” which is the email sent to a primary supporter when a new ticket is created.
The templates for these emails can all be found and configured in the configuration center:
1) Go to the “Email Templates” area in the Service Desk module in Wizdom Configuration Center.