Poll web part settings
Perform the following steps:
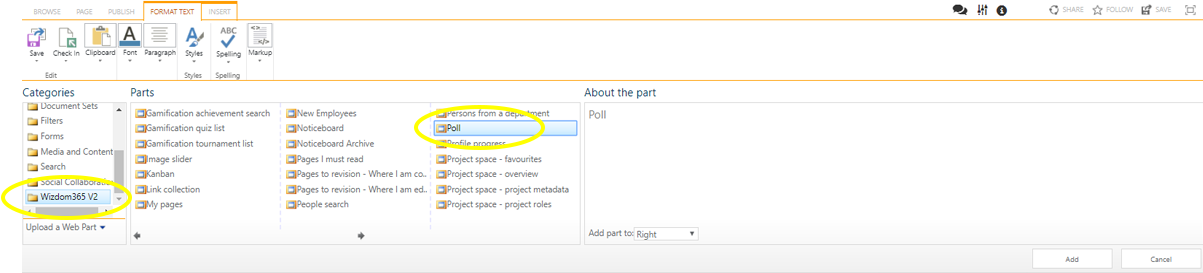
1) Edit the page and click ‘Add a web part’ to open SharePoint’s web part gallery.
2) The Poll web part is found in the ‘Wizdom’ folder.
To set up the Poll web part:
1) Selecting templates: Press the ‘Edit’ icon in the web part to choose templates for the web part.

If the poll you want to employ is already created, select it from the ‘Choose a poll’ drop down field.
If you wish to use a poll that is already created, but edit it before use, select the poll from ‘Choose a poll’ and click ‘Edit selected poll’. This will take you to the dialog with poll configuration options. If you edit a poll in one web part, these changes will also apply to all other web parts that employ the same poll.
NOTE: In order to edit a poll, you will have to be administrator of the poll in question.
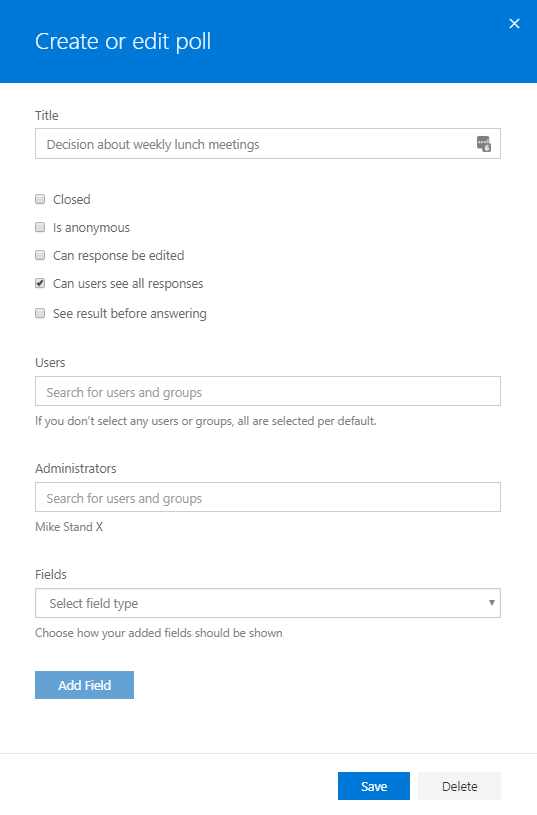
If you want to create a new poll, press ‘Create poll’ to enter the dialog for poll creation and configuration options.
Ticking ‘Closed’ will close a poll and make it unavailable in web parts.
NOTE: If you close a poll, you can no longer select it in the web part. To reopen the poll, you must go to the Poll module administration in Wizdom Configuration Center.
Ticking ‘Is anonymous’ will ensure users, that fill out the poll, are not saved with the answer. This means it’s not possible to see who submitted the answer.
Ticking ‘Can response be edited’ will make users able to edit their responses.
Ticking ‘Can users see all responses’ allows users to see the overview of responses to the poll.
Ticking ‘See result before answering’ allows users to see the overview of responses to the poll before they submit their own response.
‘Users’ lets you audience target the poll by choosing the users or groups of users that will be able to see and vote in the poll.
NOTE: If no users or groups are added to the ‘Users’ field, the poll will be visible for all users.
In the ‘Administrators’ field, you select the administrator(s) of the poll. Poll administrators are the only users that are able to edit and delete the poll.
NOTE: As for the ‘Users’ field, if no users or groups are added to the ‘Administrator’ field, all users will be administrators of the poll. This means that all users, that have permissions to edit the page or enter the module administration of Wizdom Configuration Center, will be able to edit the poll.
Now, you create one or more fields for the questions and response options you want to provide users.
Fields are the actual content (questions) of the poll. You can add three types of fields:
The ‘Radio’ field adds a number of radio buttons to the poll. Only one answer can be selected.
The ‘Checkbox’ field adds a number of chechboxes to the poll. Users are allowed to select multiple answers.
The ‘Dropdown’ field works like the radio button, but instead presents the options in a dropdown list.
A new field will be added, click on ‘New field’ to fold out the configuring options of the field.
In ‘Title’ you write the poll question.
Decide whether users are required to answer the question under ‘Required’.
Under ‘Options’ you provide users with possible responses to the poll question. Click ‘Add option’ to add additional response options and the minus icon to delete a response option.
You edit poll fields by clicking the field in question.
Delete a field by pressing the Delete option in the field configuration window.
Close a field configuration window by clicking the title of the field.
Remember to click ‘Save’ to save your changes.