Workspaces module settings
In this article
- Configuring workspace instances
- Configuring creation permissions, workspace structure, and site administrators
- Defining workspaces by the means of workspace types
- Defining workspace roles
- Defining metadata for workspace instances
- Transferring workspace roles
- Defining templates for the Workspaces module
Configuring workspace instances
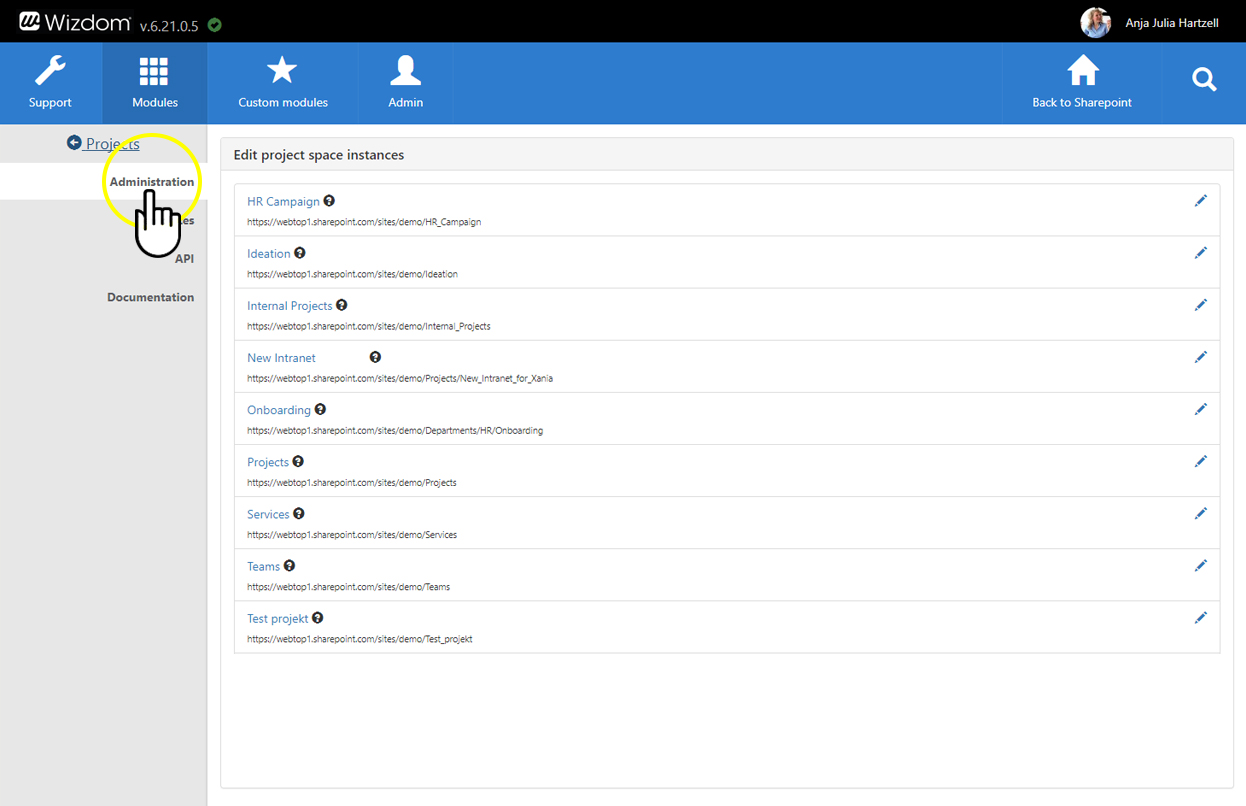
To configure and set up a workspace instance:
1) Click on the workspace instance that you wish to set up.
2) Now, you are presented to a page with four tabs each offering options for configuration:
The first tab has the name of the workspace unit. Here you define the role required to create workspaces to the unit and administrators of the unit.
Under the second tab ‘Workspace types’ you define the type(s) of workspace(s) that can be created for the unit.
The third tab ‘Metadata’ lets you define metadata for the project unit.
The fourth tab ‘Role replacement’ enables you to transfer workspace roles to other users.
To archive project instances:
You can archive project instances which means that you can hide e.g. test and unused instances from the instance overview.
To archive a project instance, you simply click the archive icon next to a project instance. This will move the instance to ‘Archived instances’. From here, you can make the project instance active again, also by clicking the archive icon.


New projects can’t be created in an archived project instance. However, projects, already created on this instance, will still work as before.
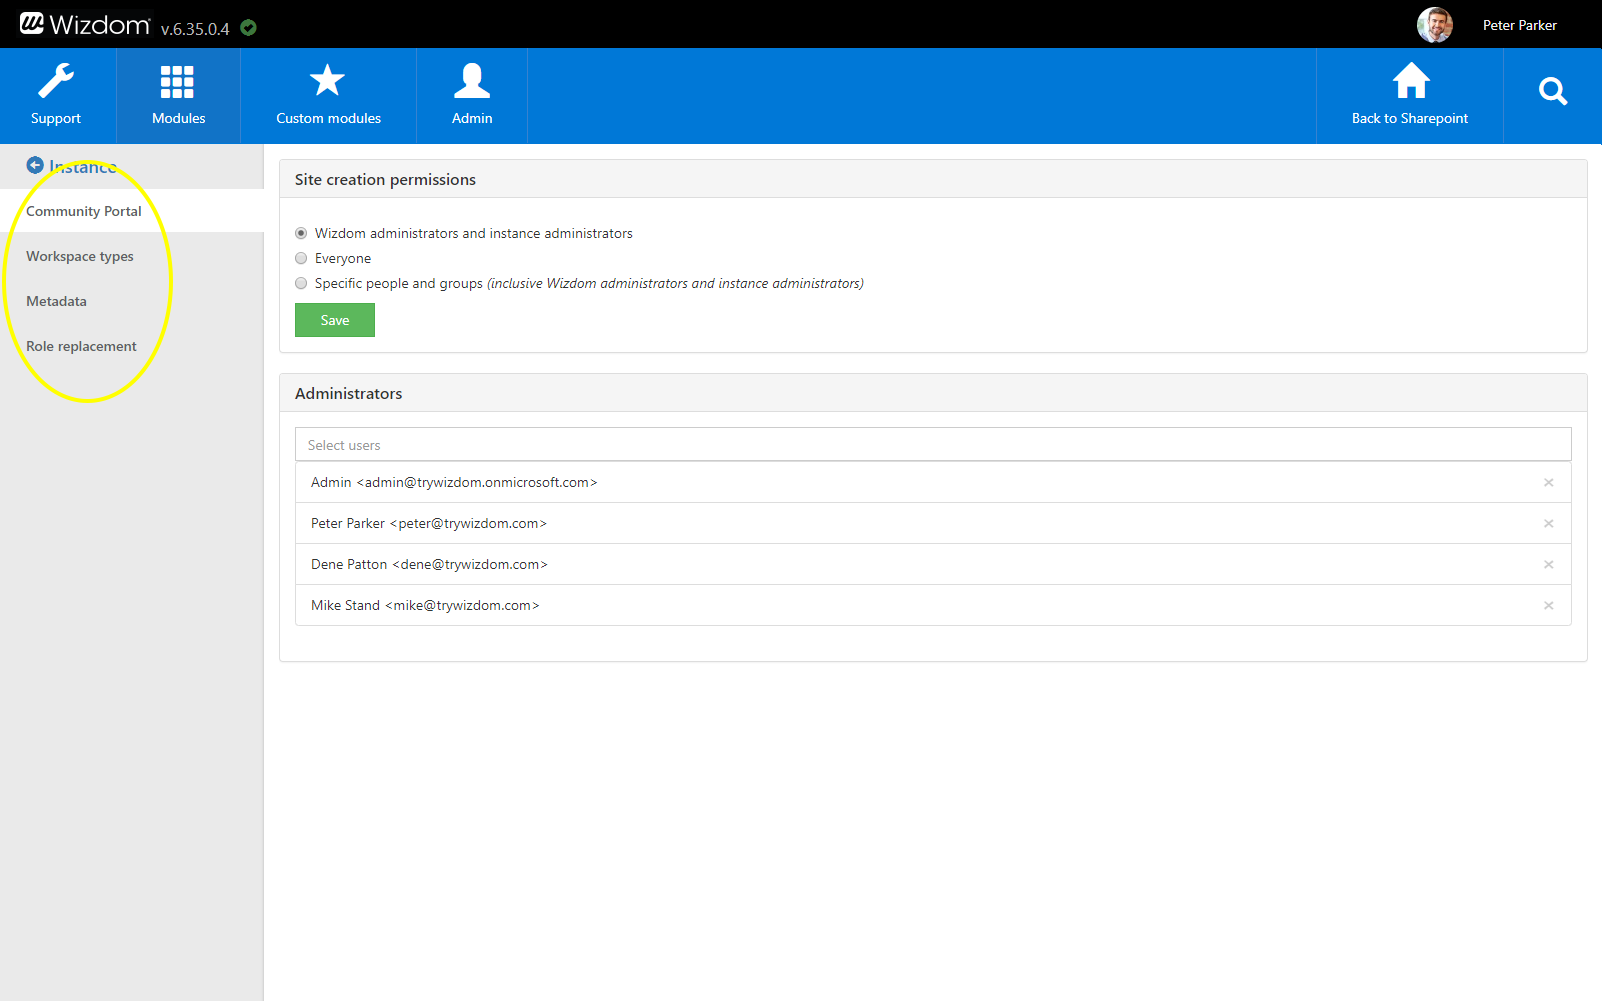
Configuring creation permissions and site administrators
To define who will have the right to create new workspaces for a project unit:
1) Click on the project unit, you wish to configure, under the ‘Administration’ area in the Wizdom Workspaces module. Settings for Site Creation Permission (some workspaces are created as sites) will be located in the top of the first page you land on.
2) Under ‘Site creation permission’, you have three options for permissions:
1) ‘Wizdom administrators and Instance administrators’, which means that only either administrators of Wizdom or the project unit can create new project spaces for it.
2) ‘Everyone’, which will make every user of the intranet able to create new project spaces for the project unit.
3) ‘Specific people and groups (inclusive Wizdom administrators and instance administrators)’. If you select this option, administrators of Wizdom, administrators of the project unit, and selected users and/or groups will be able to create project spaces for this project unit. You will be asked to define which users and/or groups should have this permission.
Defining workspaces by the means of Workspace types
You can use the Workspaces module for endless purposes and to collaborate in a variety of ways. Therefore, the module allows you to configure workspaces exactly as you wish. Also, you can create several types of workspaces to meet all the different needs you have for collaboration in different contexts.
To configure workspaces, you define one ore more ‘workspace type(s)’. A workspace type allows you to define site templates or group, roles, and metadata for the workspaces created for a project unit.
You can define as many workspace types as you wish for each workspace unit. When creating a new workspace, users can base the workspace on one of the workspace types created for the specific workspace unit.
To define the workspace type(s) for workspaces of a workspace unit, do the following:
1) Click on the workspace unit, you wish to create workspace types for.
2) Then, click on the tab ‘Workspace types’.
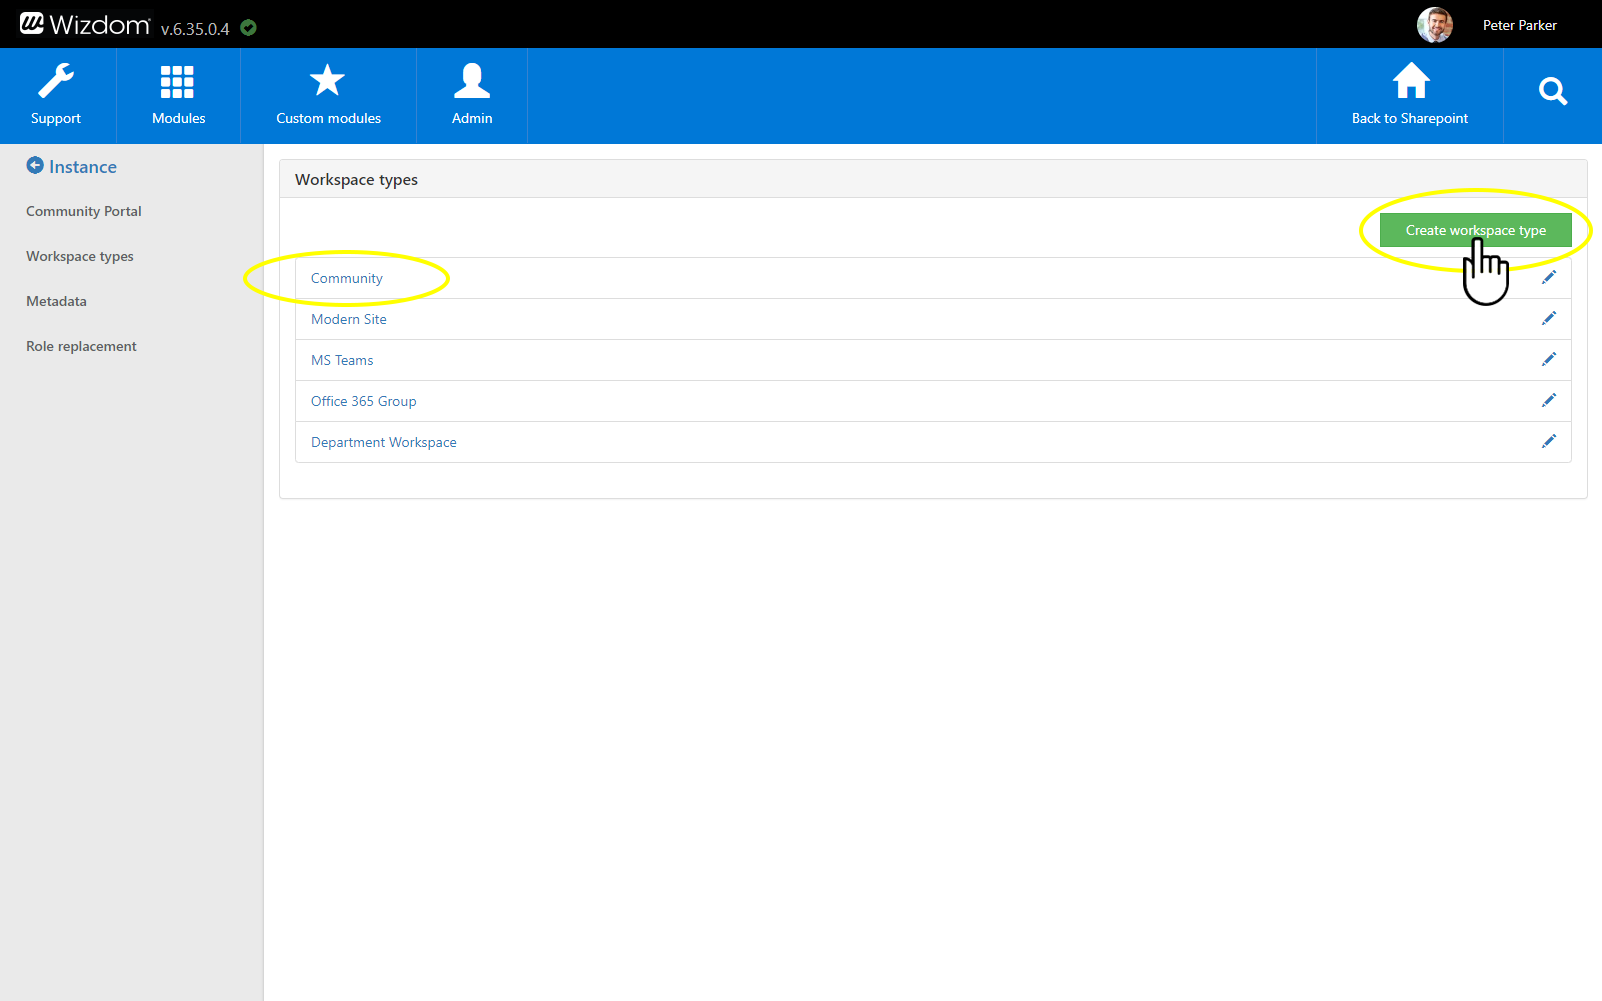
This will get you to the workspace type administration. From here, you can change the name and abilities of existing workspace types or create new.
Wizdom includes a default workspace type called ‘Collaboration’.
To create a new workspace type or change an existing, perform the following steps:
1) Click the green ‘Create workspace type’ button to create a new workspace type. To change an existing, click on the workspace type you would like to change.

2) This will take you to the workspace type administration. Here, you can define name, description, site or group, templates, structure, roles, and metadata for the workspace type.
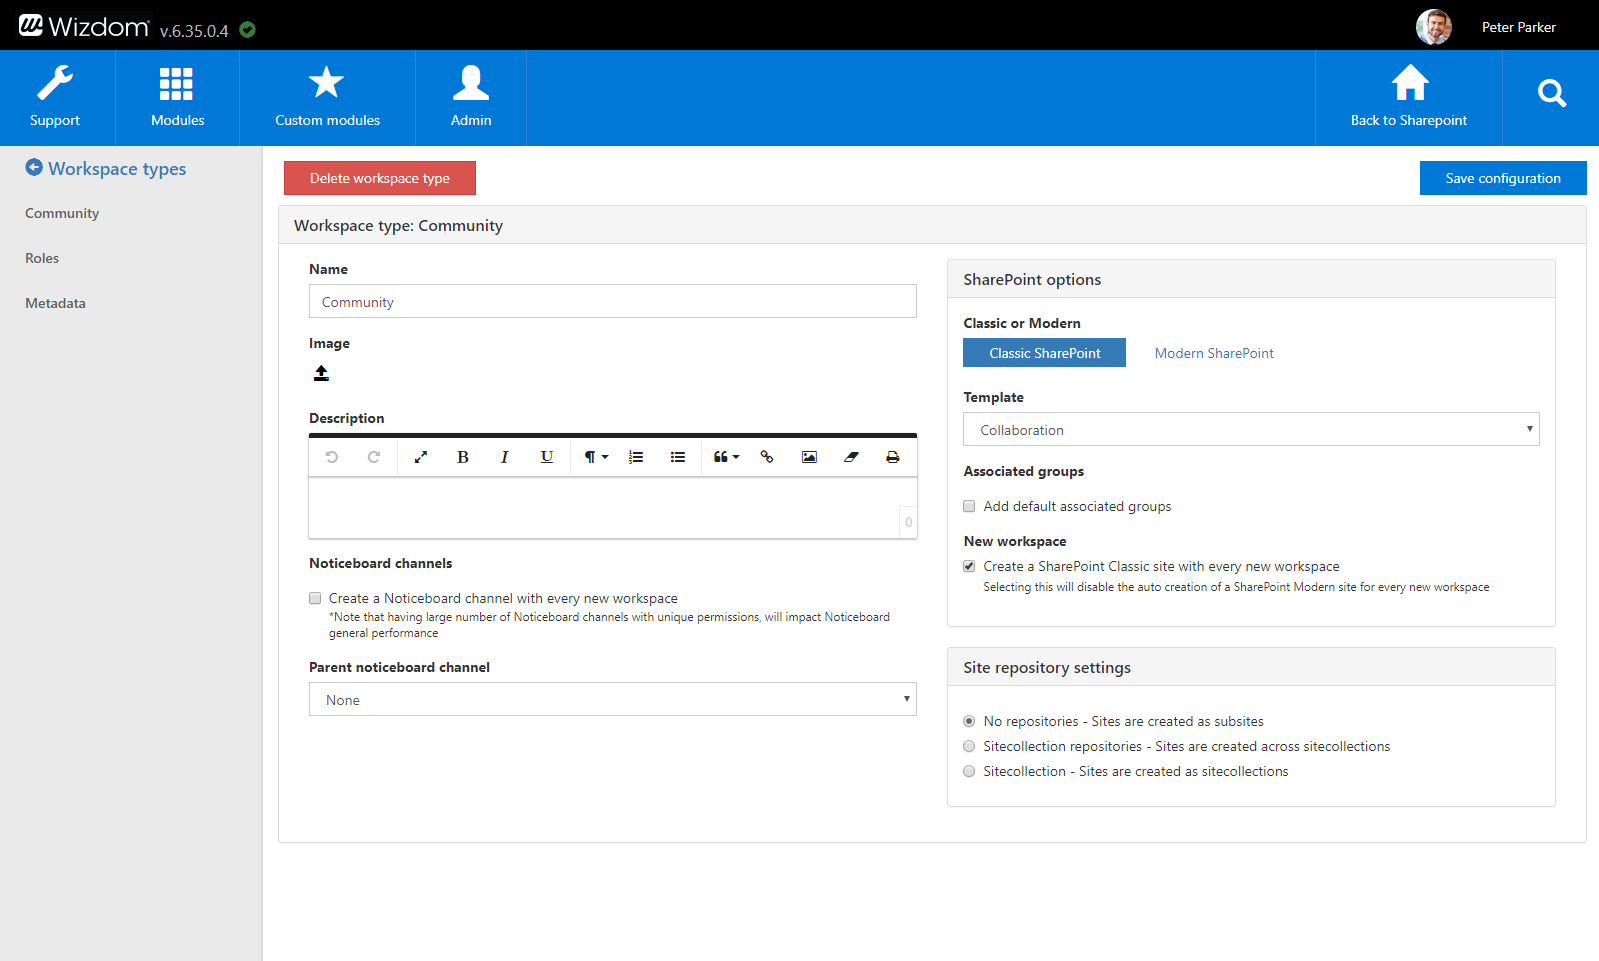
Define name, site, and description of the workspace type:
To change the name of a workspace type:
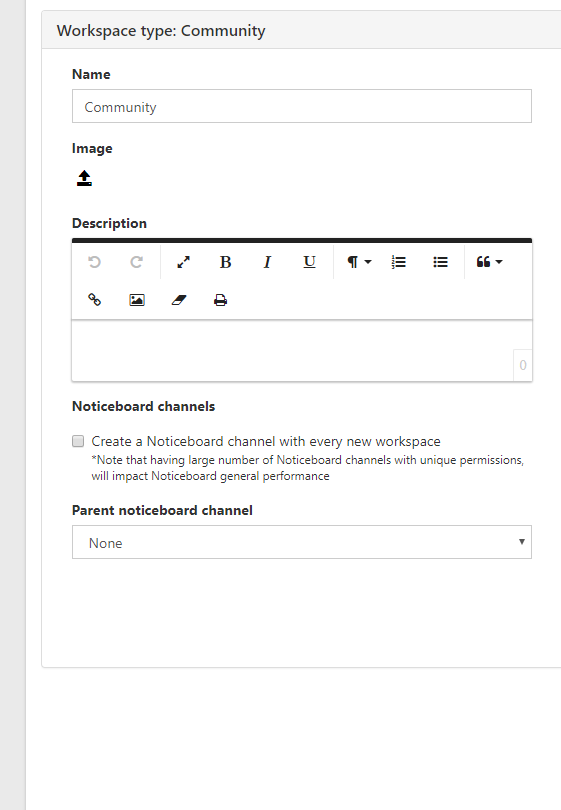
On the landing page of the workspace type administration, simply type in the name you have chosen for the workspace type, in the text box ‘Name’.
‘Image’ lets you use an image that users, creating a workspace, will see as part of the description of the workspace type.
‘Description’ lets you enter a text description of the workspace type that users, creating a workspace, will see.
You can tick under ‘Noticeboard channels’ to have a Noticeboard channel created wit every new workspace. The permissions for the Noticeboard channel will mirror that of the workspace. In this way, the channel can work as a communication channel between the workspace members.
A ‘Parent Noticeboard channel’ can be chosen for the Noticeboard channel. E.g. if you want to sort all Workspace Noticeboard channels under ‘Workspaces’.
Note: As the permission settings for each workspace will be reflected in the permission settings for the corresponding Noticeboard channel. This means, that even though the Noticeboard channels created for workspaces will be listed among all the Noticeboard channels in your solution, you can not change permission settings for these channels from Noticeboard’s administration.
The site/group and template you use for a workspace type define the configuration of a workspace. E.g., this could be configuration about which type of SharePoint site (team site, publishing site, modern site etc.), features to activate, web parts to be added, lists to be created, site columns to be created, content types to be created. You can use Wizdom and SharePoint site templates as well as modern team sites with Office 365 Group. Custom site templates can be created by the use of Wizdom module templates.
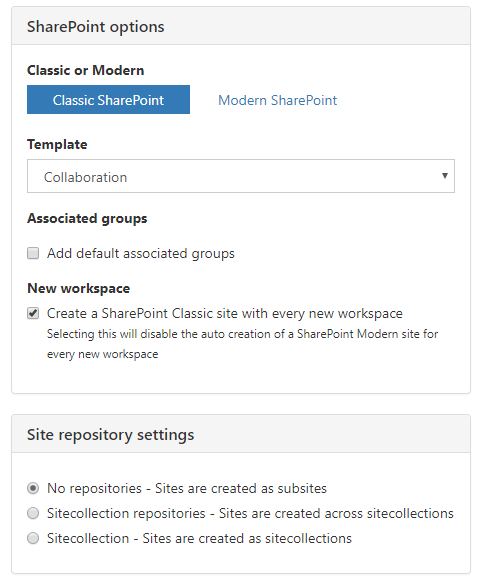
To define the site or group of a project type: First, you are offered to choose between basing it on classic and modern SharePoint.
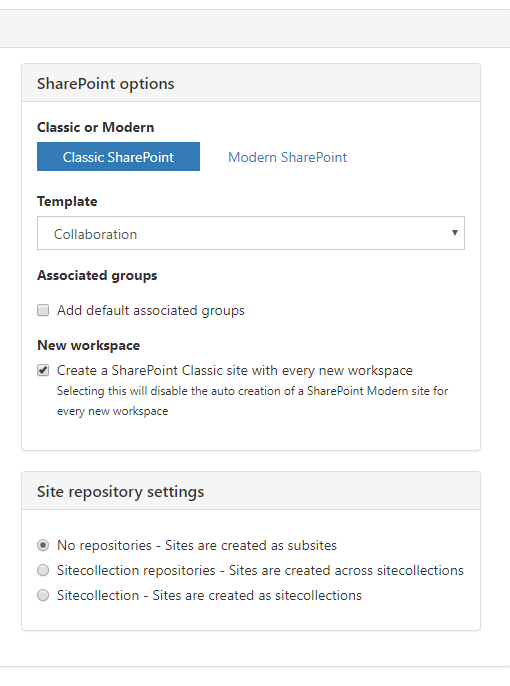
Selecting classic SharePoint, you are met with the following options.
‘Template’ lets you select a template for the workspace between the classic templates available in your solution.
‘Site repository settings’ lets you define the structure of the workspaces under an instance.
Selecting ‘No repositories’, all workspaces created under an instance will be created as subsites to this instance.
Selecting ‘Site collection repositories – sites are created across site collections’, each site collection can host multiple workspaces all with the same site type.
Selecting ‘Site collections – sites are created as site collections’, each workspace created with this workspace type will get its own site collection.
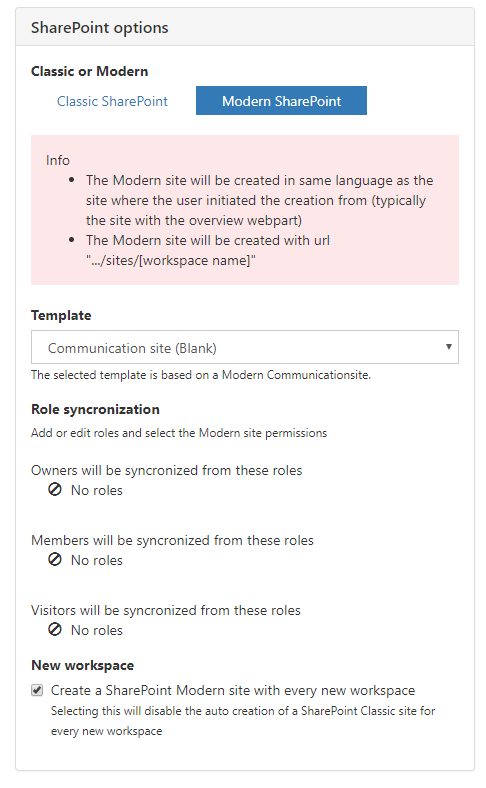
Selecting modern SharePoint, you are met with the following options.
‘Template’ lets you select a template for the workspace between the modern templates available in your solution.
Defining project roles
A project type, also, offers you to define roles for project spaces created with this type. E.g. you can define roles like ‘Guests’, ‘Editor’, ‘Collaboration team’, ‘Project manager’ etc. with a different set of rights in regard to the project space with this project type.
A role is similar to SharePoint’s permission levels including extra Wizdom specific permissions.
>Project roles are defined on
1) Under the project type administration, press the ‘Roles’ tab. This will navigate you to the role administration. Here you create and define the roles for the project type and their respective level of rights.
You can create as many roles as you like.
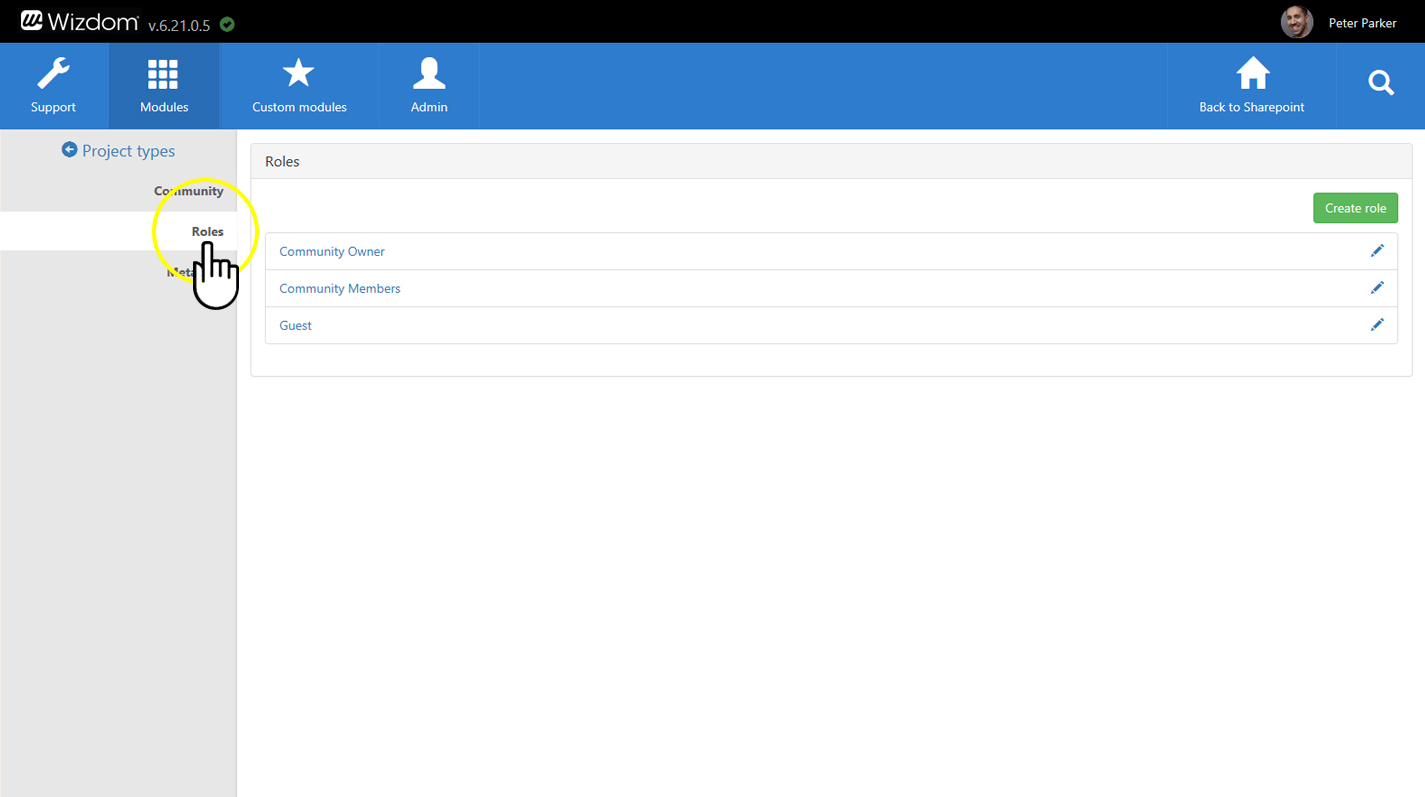
2) Press ‘Create role’ to define a new role, or click on an existing role to edit it. A window will pop up and let you define the role in question.
3) The role administration window is split into multiple sections.:
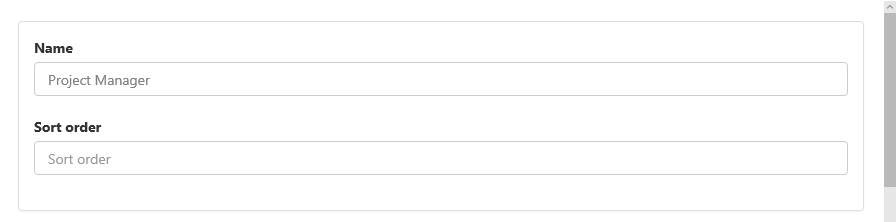
Basic information:
In the first section you define basic information as name of the role and sort order.
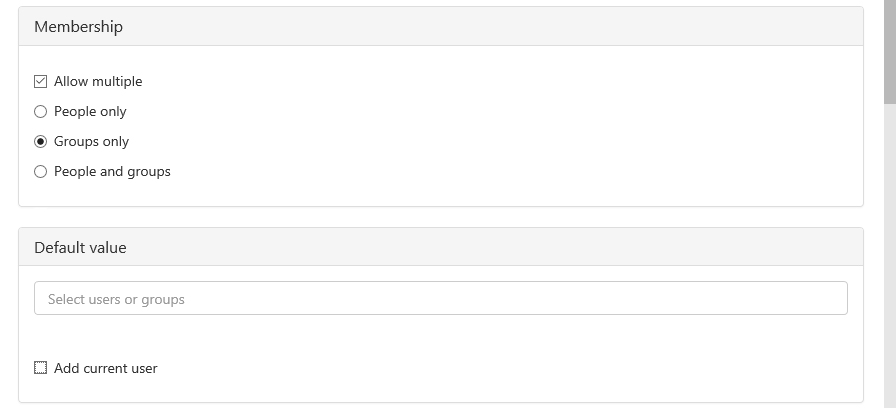
Membership:
This section allows you to select types of participants that can be added to the role.
Choose between:
‘People only’ which will only allow individual users to be added to the role.
‘Groups only’ which will only allow groups of users to be added to the role.
‘People and Groups’ which will allow individual users as well groups of users to be added to the role.
Selecting ‘Allow multiple’ will make it possible to allow several users and/or groups to be added to the role. If this field is not selected, only one group or user can be added to the role.
Under ‘Default value’, you define the particular user(s) and/or user group(s) that are added to the role by default.
Ticking ‘Add current user’ will automatically add users, that create project spaces of this project type, to the role.
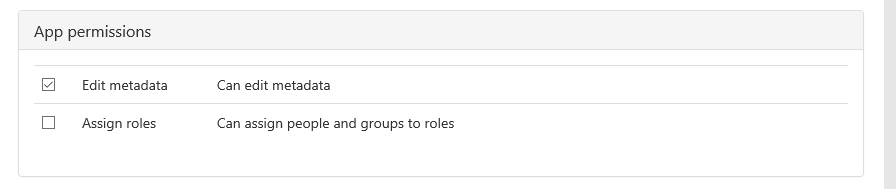
App permissions:
Under ‘app permissions’, you define whether or not members of this role are enabled to edit metadata and assign roles to this project type.
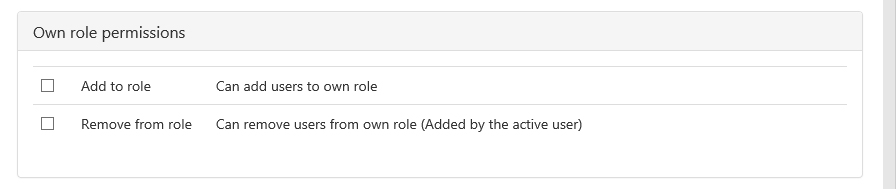
Own role permissions:
Here you define whether users with this role will have rights to add and/or remove other users to/from this role.
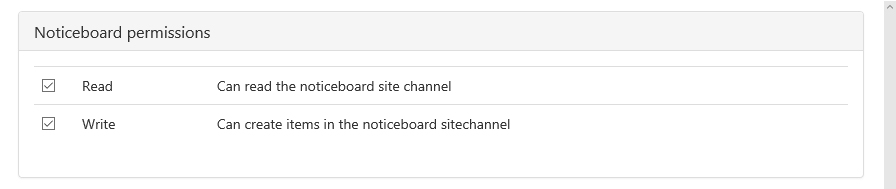
Noticeboard permissions:
If this is enabled, a Noticeboard channel can be created for project spaces created on a SharePoint site.
Under this section, you define whether or not the role will have permissions to read and/or write news from this channel.
SharePoint permissions:
In this section you define SharePoint permissions in regard to lists permissions, site permissions, and personal permissions.
In top of the section, you can apply SharePoint’s default permission levels by selecting between leves in a drop-down list. These settings will, then, be applies to the lists, site, and personal permission settings further down the page.
You can make changes to these default permission settings by ticking and/or unticking boxes under the sections for lists, site, and personal permissions.
You can set up your own custom permissions by selecting appropriate boxes under the sections for lists permissions, site permissions, and personal permissions.
Finalize by clicking ‘SAVE’ to save your changes, ‘CLOSE’ to close the role without saving your changes, and ‘DELETE’ to delete the role.

Under the metadata tab, you can manage metadata specific for a project type.
You can add or remove metadata created on project unit level or create metadata for the specific project type.
Metadata created on project type level can’t be selected in the overview web part and, therefore, not displayed as column.
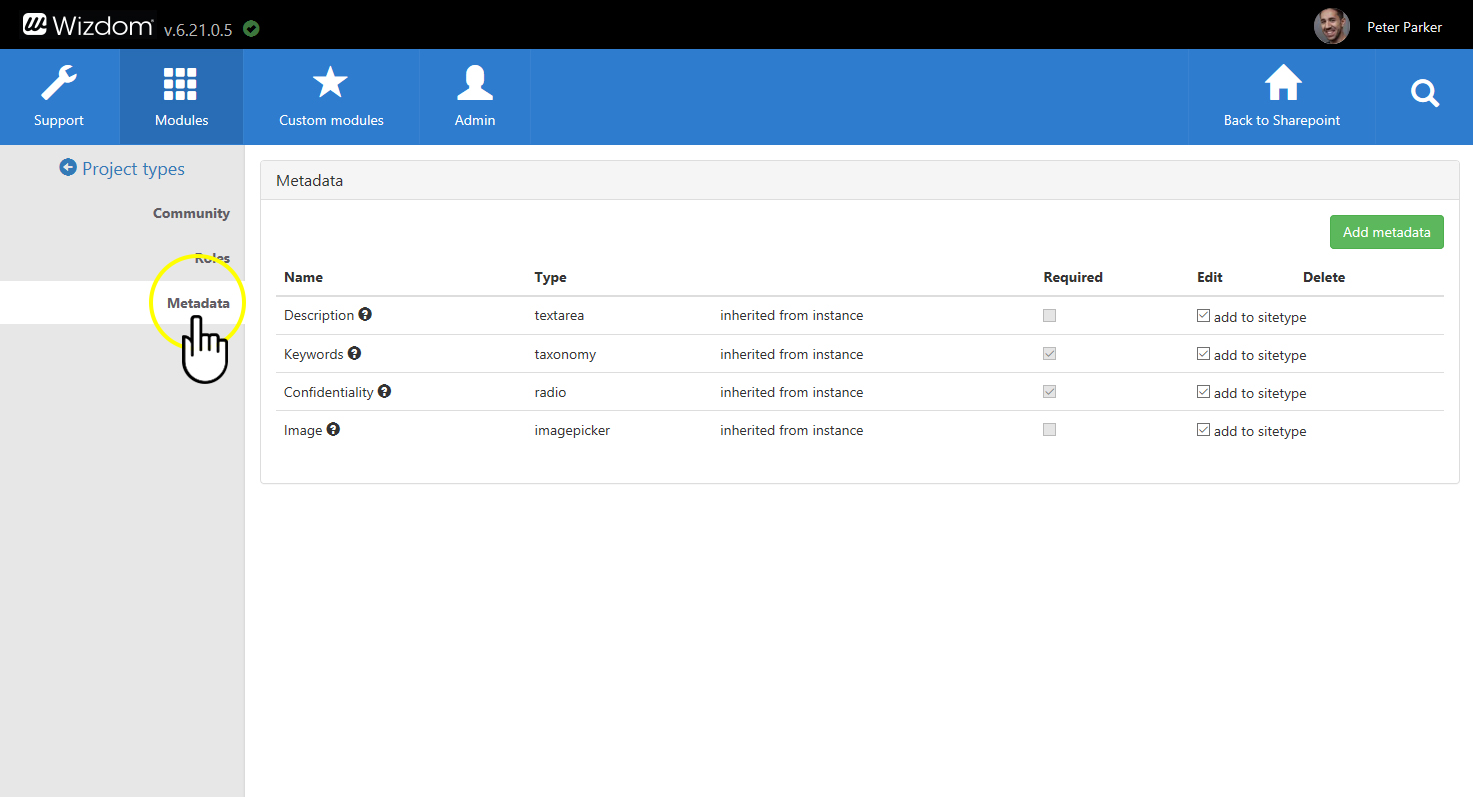
Defining metadata for project instances
Metadata can help you tag project spaces with relevant data.
Metadata defined on project unit level will be shared metadata that can be used across all collaboration project types in the project unit. Only metadata specified on this level can be selected in the overview web part and displayed as columns.
To define metadata for a project unit, perform the following tasks:
1) Click on the project unit, you wish to define metadata for, under the ‘Administration’ area in the Wizdom Collaboration Engine module.
2) Then, click on the tab ‘Metadata’.
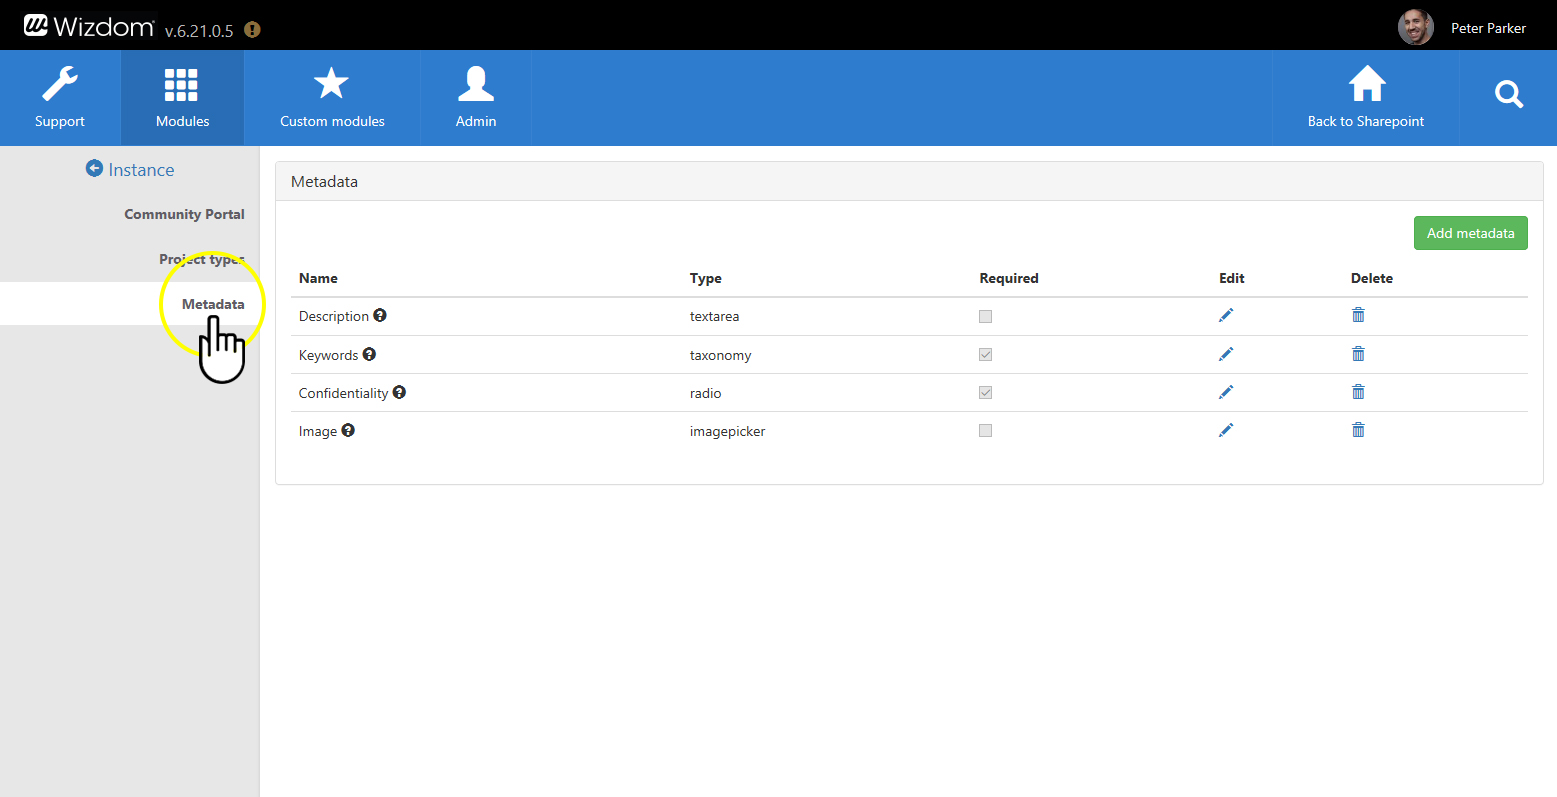
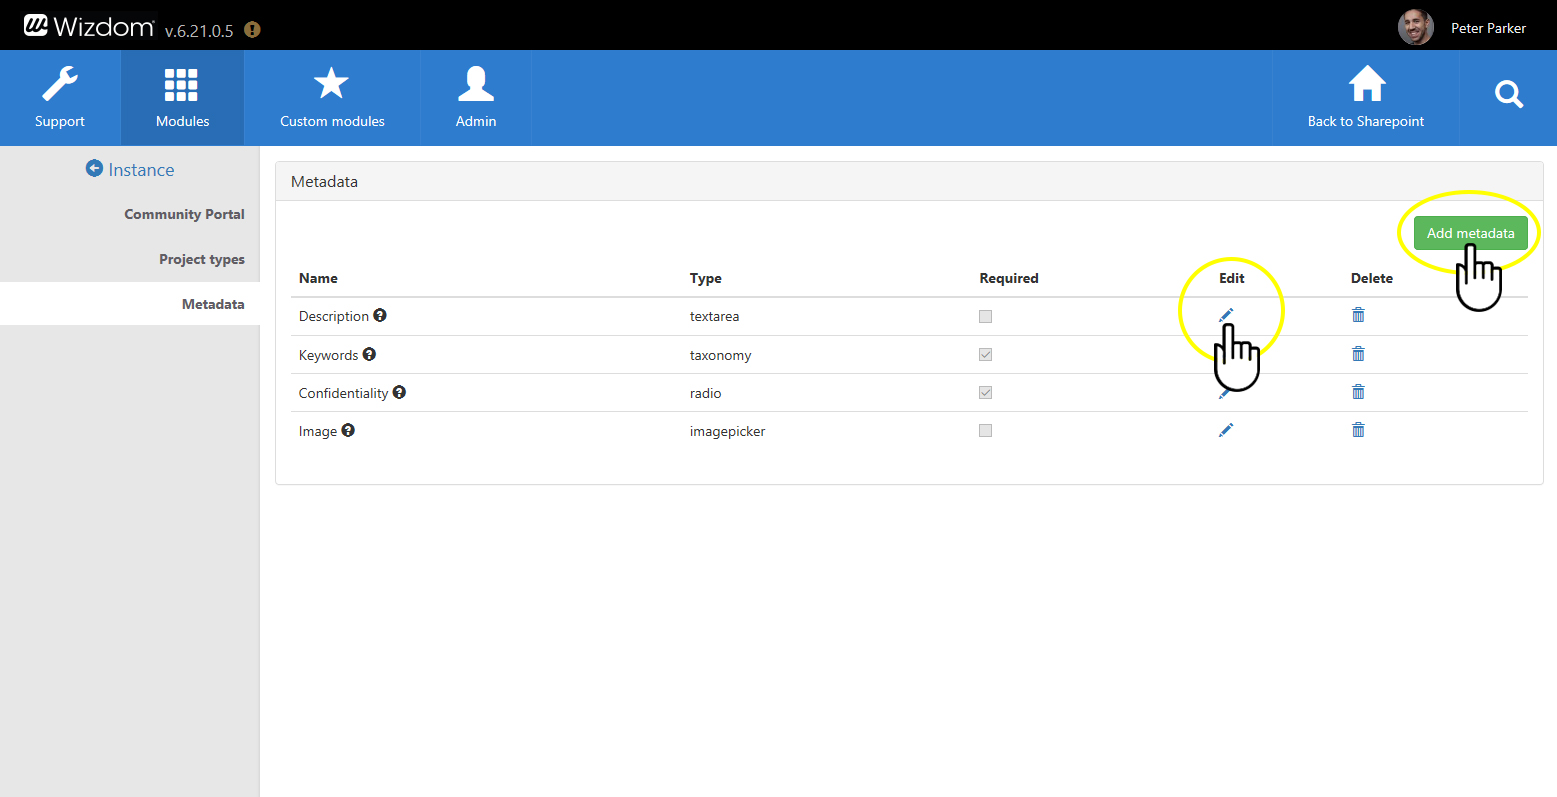
3) This will take you to the metadata administration area where you can either create or edit metadata. Click on the ‘Add metadata’ button to create a new metadata term. Or click on the edit icon in line with an existing metadata term to edit this term.
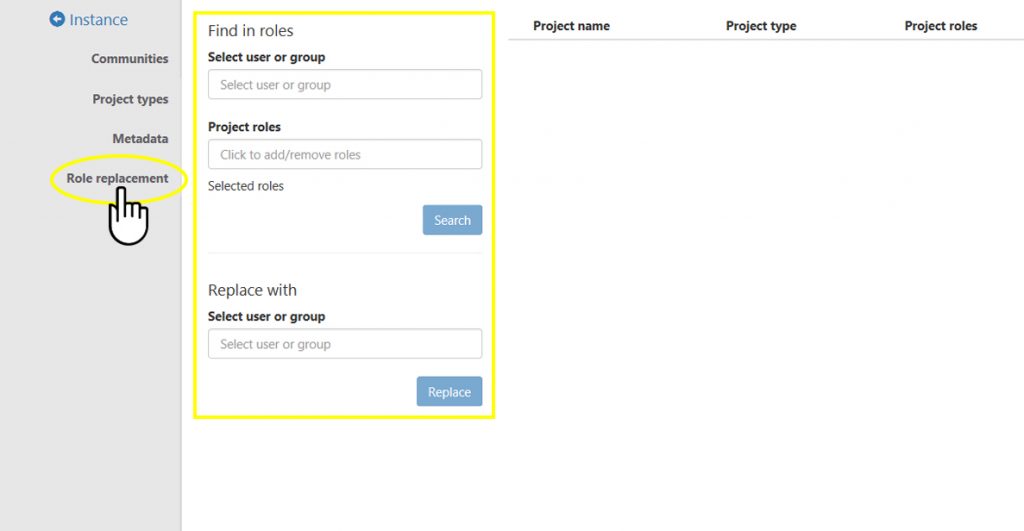
Transferring project roles
In situations where an employee changes role or job, the role this person has had in one or several projects might needs to be taken over by a different employee.
The role replacement tool in Wizdom Projects module allows you to transfer a role from a user or group of users to another user or group of users, only with a few clicks from the module administration in Wizdom Configuration Center.
To transfer a role:
1) Go to the ‘Administation’ area in the Wizdom Projects module, click on the project unit you’d like to configure and then on the ‘Role Replacement’ tab.
2) Use the tool to first find the user or group of users you’d like to replace by a different user or group of users.
3) Mark the role(s) of the user or groups of users you’d like to transfer.
4) Finally find the user or groups of users that you would like to apply the role(s) to.
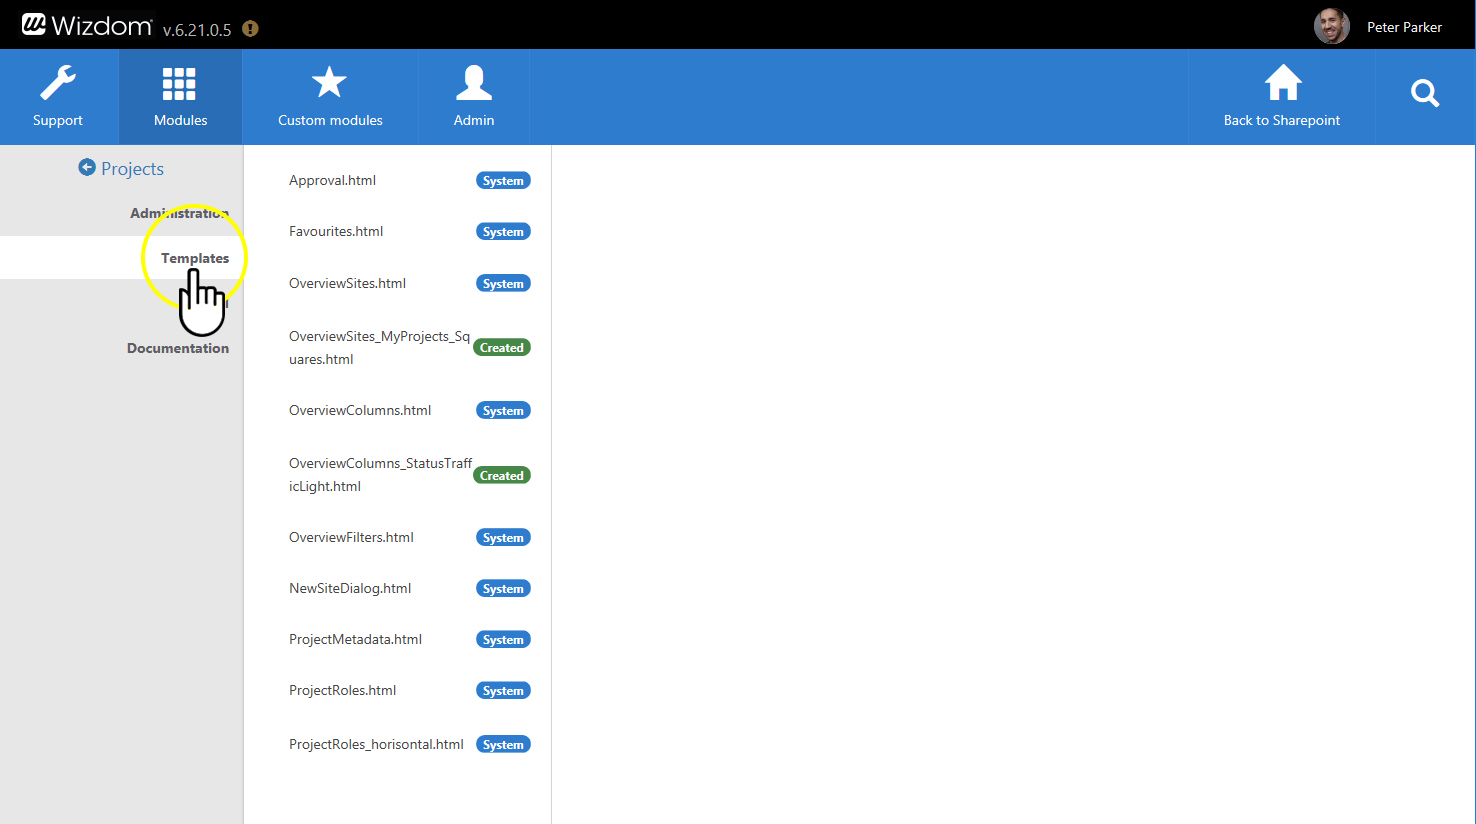
Defining templates for the Projects module
In Wizdom Configuration Center, you can define and customize the look, feel, and functionality of the Projects module by the means of templates.
The Projects module includes a selection of pre-defined templates the module’s web parts. These templates control the look, feel, and functionality of the web parts.
Site templates for the Projects module defines features to be activated, web parts to be added, pages, documents, folders, lists, and libraries of the site, as well as other specific actions like code to be executed.
A site template can be assigned to a project type so that creating a new project space of that project type will create a project space configured as the site template describes.
You find an overview of all templates for the Projects module’s web part under the ‘Templates’ area in the Projects module administration.
From here, you can configure existing web part templates and create new.