Configuring Wizdom’s modules and web parts
Wizdom includes a wide selection of modules and web parts that each offer a unique function for your intranet. Almost all modules and web parts can be set up to meet your concrete needs in the context where they are used. While configurations done one modules in Wizdom Configuration Center will have global effect and affect the whole Wizdom application, configurations done one web parts placed on pages will only affect the web part on the particular page.
In this article we will introduce you to how you configure, respectively, Wizdom’s modules and web parts.
Modules vs. web parts
Wizdom includes a selection of 60 modules. Most of these modules have one or more web parts. The role of these web parts is to make the functionality of the modules available on intranet pages.
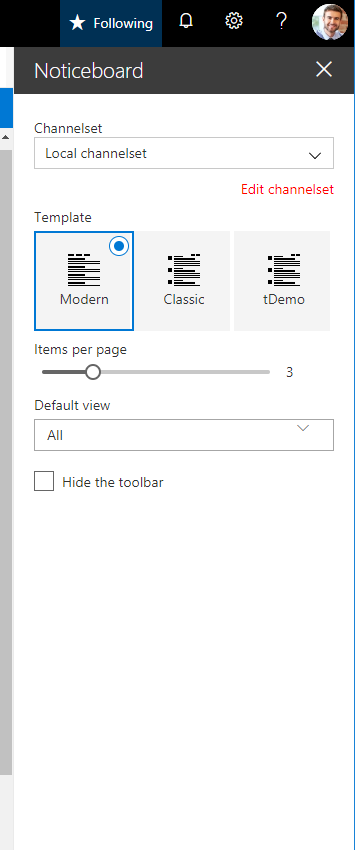
E.g the Noticeboard module includes two web parts: The News List web part and the Archive web part. Added to a page, the News List web part will list Noticeboard news in a news feed and provide users with a selection of tools, e.g. to write, share, and comment news. The Archive web part will provide a search function to find older Noticeboard news. If it weren’t for these web parts, users would simply not be able to see or use the Noticeboard module.
Configuration changes to a module will have global effects whereas web part configurations only affects the particular web part locally.
General module settings
Wizdom’s modules are configured in Wizdom Configuration Center. A configuration made to a Wizdom module in the configuration center will affect the module in the entire Wizdom application.
Modules are located under the ‘Modules‘ tab and the modules with restricted access appear under the ‘Admin‘ tab. In order to configure these, you must be assigned the role as an intranet administrator. If there are any custom-built modules, these will appear under the ‘Custom modules‘ tab.
Modules are alpabetically sorted, and to simplify searchability you can change name sorting to ascending or descendning. Additionally, there is the option of searching for a specific module in the search bar.
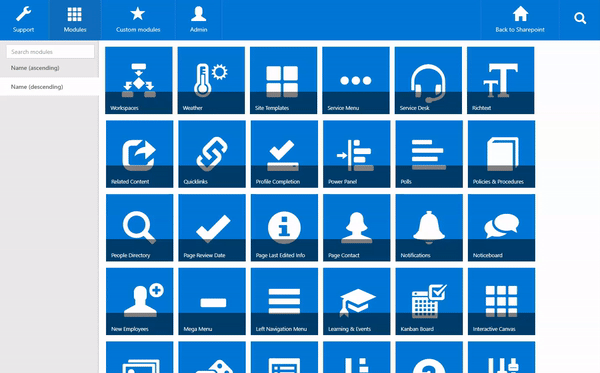
Once the desired module have been located, you can click on the icon to start configuring the settings. The menu bar to the left displays a list of options, allowing you to set up each module as you wish.
Configuration options differ between modules. However, several tabs are common for each of them:
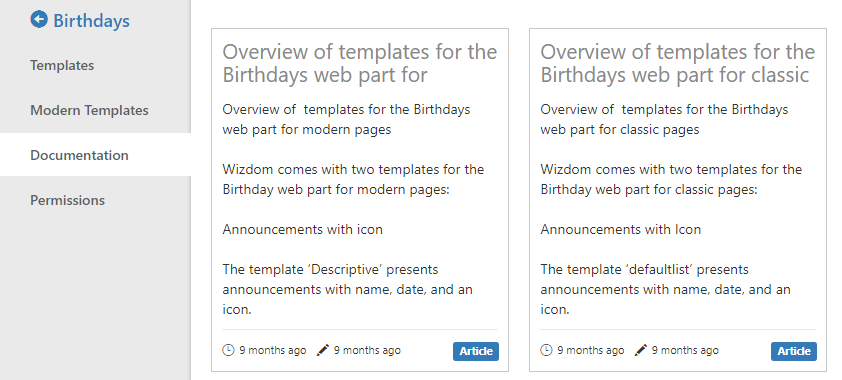
‘Documentation‘ displays all technical documents related to the topic. By clicking on an article, you will be redirected to Wizdom’s Help & Training Portal.
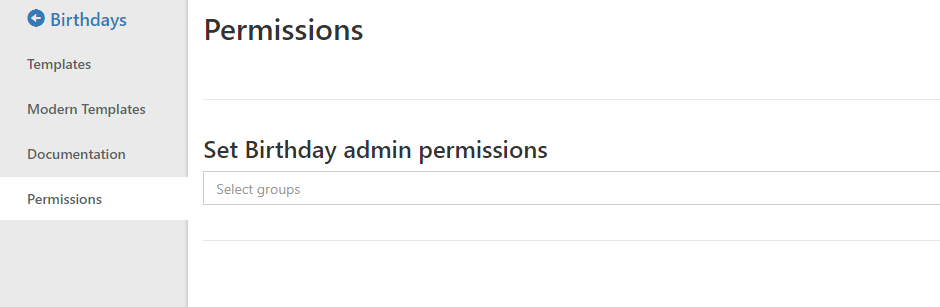
‘Permissions‘ allows you to assign specific groups as administrators for that particular module. For example, if you want to give the HR-department permission to edit the Birthdays module, simply enter the group name in the bar. Note that it requires the group to be connected with either AD or Wizdom Audiences.
If there is no connected group to a module, it means that the access is restricted to global administrators only.
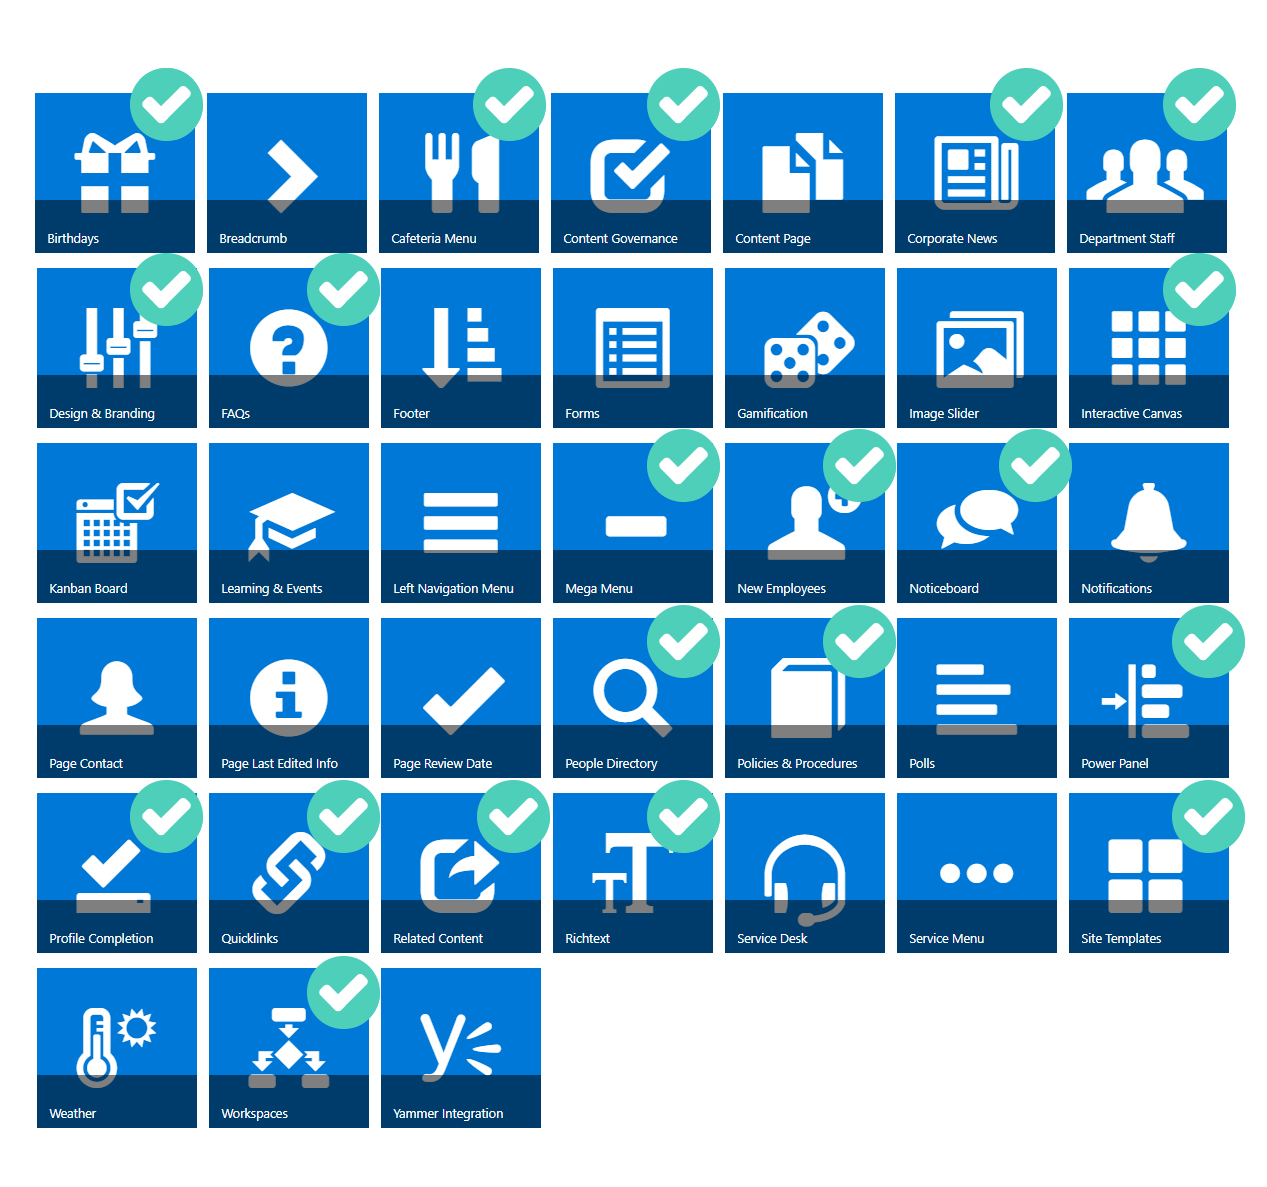
Overview of modules
Wizdom’s modules enable various functions on your intranet and bring value to your organization. All modules are available on SharePoint’s classic experiences, whereas for modern, some modules do not serve any functions.
Below is an overview of Wizdom’s modules with a green tick indicating relevance for both classic and modern experiences.
Note that the module’s functionality and configuration might differ between classic and modern.
Modules marked with a green tick are featured on both classic and modern:
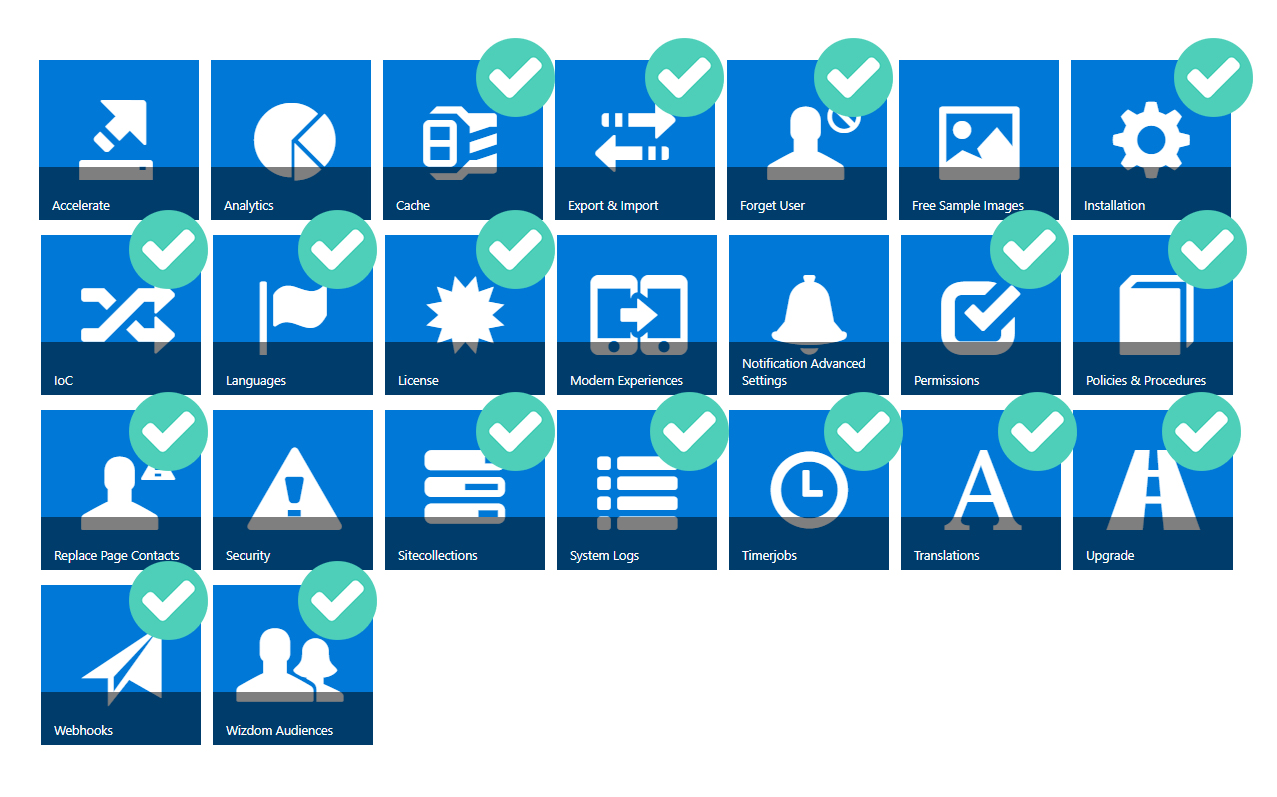
Same applies for Admin modules:
Wizdom’s web part settings for classic
Wizdom’s web part settings define how a Wizdom web part will behave e.g. what content the web part will show.
The settings options will vary depending on the web part, as the settings options for a Wizdom web part will provide you with tools to adjust relevant settings for the web part in question.
When you configure Wizdom’s settings for a web part you start by editing the page where the web part is placed.
When a page is in edit mode, you will see an ‘Edit’ icon in each Wizdom web part. Press this button to configure the settings for a particular web part.
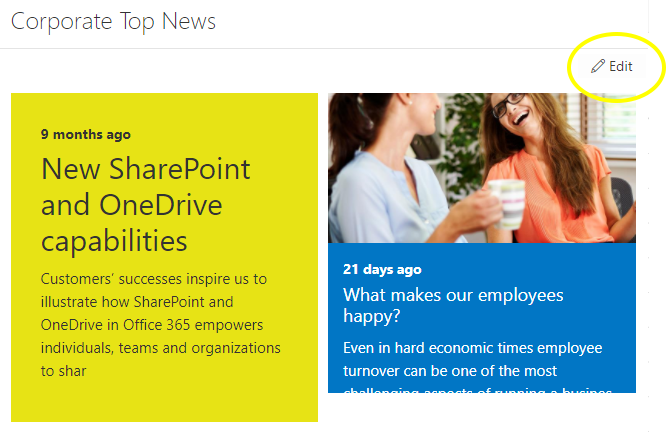
A window with setting options for the web part will open.

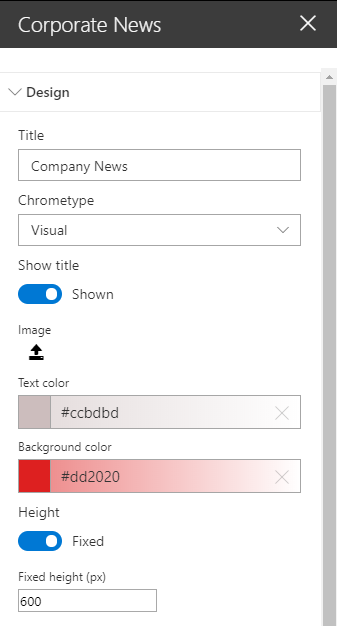
Settings options for the ‘Corporate News’ web part.
Adjust the settings and remember to press ‘SAVE’ before checking in the page and publishing your changes.
Wizdom’s web part settings for modern
For modern web parts, Wizdom’s and SharePoint’s web part settings are configured in the same way. However, with each Wizdom module comes various configuration settings that enable changes in design and properties. These vary across modules, but share some common configuration settings.
You can edit a web part by locating it on the intranet and click ‘Edit’ in the top right corner and choose the web part you want to modify. A panel will appear to the right where you can adjust the settings.
The ‘Design’ tab looks the same for each web part which gives you the option of designing each web part according to your preferences.